TRUE LOVE


I love Aruba! I also love piping hot coffee, matcha tea, gray sweatshirts, and crisp clean cotton sheets. I love leather and denim coats. I love day-old haircuts, striking asanas and posing upward toward Heaven. I like deep conversations at my dining room table. I love to belt out songs in church, especially ones that have the word Halleluyah in them. But out of all of these things I love, they give me something back for loving them. Sadly, it boils down to this: everything in this world that I love and if it loves me, loves me, only conditionally.

Then, like the Grinch, she thought of something she hadn’t before! What if true love, she thought, didn’t come from a store? What if true love, perhaps, is a little bit more!”

Then she goes and gets all spiritual.

Take Roman’s 5:8. God says.”But God commanded His love toward us, in that while we were sinner’s Christ died for us.”

God doesn’t say, “As soon as you clean up your act, I’ll love you.” Nor does He say “I’ll sacrifice my Son if you promise to love me.” In Romans 5:8, we find just the opposite. God wants us to know that His love is unconditional, so He sent His Son, Jesus Christ, to die for us while we were still unlovable sinners. Now that’s true love!

It’s so nice to find that true love can’t be bought from a store.

That is because, true love is a whole lot more!

Thanks for reading!

Hoping your day is filled with love!!

YOGA CHALLENGE FOR BUILDING STRENGTH (inner and outer strength)

Hit the mat with me and let’s get stronger together!

The yoga class below is chock full of yoga positions to help us feel strong and movements to help us build a strong body. Focusing on the verses of Scripture as we move in and out of these positions, will help us to be strong like God says that we are!

My biggest challenge here is wrapping my head around God’s strength. He is the creator of you and me. If that is not enough, He breathed all the stars into existence and walked on water too. He parted the giant sea and let people walk across it. He also raises people from the dead, including Himself once. He is way beyond strong. Best part? He says He will give us “His” strength! Imagine? He says, Be strong in the Lord and in His mighty power, (Ephesians 3:16).  (Psalm 46:1), tells us to let God be our refuge and strength because He is a very present help in need. And, He tells us that when we feel weakest is when He makes us strongest, (Joel 3:10). What blows my mind is, all that is required for possessing God’s amazing strength is….ask! Then trust Him, believing He will do it!

I hope you enjoy this full body yoga class. I realize that not everyone can do every position listed here. Don’t worry though. I always provide a detailed instruction of each position and a less challenging version too!

I hope you have fun and get stronger and I thank you for sweating with me! Now, let’s get started!

Please take a few moments to prepare your mind and body by sitting comfortably and breathing deeply.

1.) Star Pose Bend and Stretch

  • Stand with your feet out to your sides, toes pointing forward. (the wider your legs, the more difficult the pose)
  • Inhale, stretch upwards, extending your arms overhead. (interlock fingers with pointer fingers extended)
  • Exhale, slowly bending forward. (lead with your chin as you bend, stretching out and then down)
  • About halfway down, twist slightly to your right knee. (opposite arm, then gently pulls head to knee)
  • Repeat on each leg, pulling your head to each knee for 10 times on each leg.
  • Always begin with the Star Pose Stretch up before bending to each side.
  • You may only reach your hip, thigh, knee, or ankle at first. Simply do the exercise from there. You will still be building strength from where ever you may begin!


2.) Extended Leg Squat

  • Bend your knees while placing your hands in front of you. (gently lowering your torso)
  • Extended your left leg to the side and stretch.
  • Lift your sitting bones while keeping knees bent.
  • Extend your right leg to your side and stretch.
  • Repeat 2 more times.
  • When you are on your left leg with your right leg extended again, position your right toes to the side while lifting your back left leg.

3.) Warrior III

  • Rise into Warrior III.
  • If you can, press your palms into prayer pose.
  • Breathe deeply for 20 counts.
  • If you need support keep your palms on the mat, or use a sturdy chair, desk, table or wall for support.
  • Repeat the process of Extended Leg Squat into Warrior III balancing with your left leg on your mat!


4.) Warrior Dips

  • Stand with your legs together.
  • Step out with right leg into Warrior I position.
  • Your hips should be squared, facing forward.
  • Press your palms together with your pointer fingers extended.
  • Inhale, raising your arms over head and straighten both your legs. (back heel should be up)
  • Exhale, bending both your knees. (the deeper the bend, the greater the challenge)
  • Lift with inhales and straight legs.
  • Lower with exhales into dips by bending your knees.
  • Repeat with your right foot forward 10 -30 times.
  • Walk your back leg in for better balance; keep your hands on your hips, and dip as low as is comfortable for you for a less intense challenge!

5.) Star Stretch to Warrior II

  • Inhale in a Star Stretch position, arms overhead.
  • Exhale, pivoting your right foot to your right side. (your toes are pointing forward or to the right side)
  • Bend your right leg into Warrior II.
  • Try to keep your hips looking at the front of the room or forward facing.
  • Open your arms wide. (extending out from your shoulders)
  • Lift your forward foot for an added foot, ankle, and calf stretch.
  • Inhale again into Star Stretch, then exhale again into Warrior II.
  • Repeat 5-10 times.
  • Walk your legs in for less of a challenge!

6.) Peaceful Warrior 

  • Same starting position as Warrior II.
  • Lift your forward right arm and follow it back with your head.
  • Let your back left arm lower behind your torso or leg.
  • Breathe deeply for 5-10 counts!

 7.) Extended Side Angle

  • Bring your back left arm up and over your forward knee.
  • Your forward right arm may rest on your thigh or knee, even your hip.
  • Breathe deeply for 5-10 counts.
  • Move slowly from Extended Side Angle to Peaceful Warrior 5 times! (only the arm position changes)

8.) Warrior II 

  • Lift your hands over your head, and press your palms together.
  • Lift your forward right heel.
  • Breathe deeply for 5-10 counts.
  • Walk your legs in closer for less of a challenge!

9.) Star Stretch to Wide Legged Horse Stance Position

  • Stretch into Star Pose Stretch with a big inhale. (both toes are pointing forward)
  • Exhale and release your arms pressing your palms together while bending your knees out to the sides. Toes should be pointed out slightly. (knees should not extend over toes)
  • Repeat the stretch up with big inhale, then exhale, releasing your arms and bending your knees to the sides.
  • Repeat the process 10 times.
  • For a less intense version, slightly bend your knees and do not extend them so far to the sides!

10.) Repeat numbers 2-10 with your left leg forward!

 11.) Seated Shoulder and Chest Opener

  • Sit on your heels.
  • Stretch your left arm up, bending it behind your head.
  • Stretch your right arm up behind you.
  • Let your fingers meet, or move them as close together as you can.
  • Stretch and breath deeply for 10 counts.
  • Repeat with opposite arms!


12.) Child’s Position

  • Lean forward.
  • Rest your forehead on the mat.
  • Extend your arms above you on the mat.
  • Rest here for 10 deep breathes!

13.) Downward Dog

  • From a Child’s Position, lift your sitting bones.
  • Your arms are directly below shoulders.
  • Your feet are directly below hips.
  • Your legs are as wide as your hips.
  • Stretch and lengthen your legs into Downward Dog.
  • Breathe deeply for 5 counts.
  • Remain in a Child’s Position for a less intense challenge. Or come on your hands and knees – try curling your toes under and lifting your sitting bones up. Repeat a few times!

14.) Plank Position

  • All hand, feet, and hip positions remain the same as Downward Dog.
  • Simply lower your sitting bones from Down Dog into Plank Position.
  • Deeply breathe for 10-30 seconds.
  • You may be on your knees or lower to your knees during the exercise and still build strength in your core!

15.) Knee to Chest Planks

  • From Plank Position ( or on your knees in a Plank position) please inhale deeply.
  • Bring your right knee to your chest and exhale.
  • Repeat bringing each knee to your chest for 10 counts each leg.
  • Come to Child’s Pose.
  •  Repeat 10 more counts on each leg. (Total is 60 times or 30 times each leg)
  • Lower your knees to your mat and do this exercise from there for a less intense version!

16.) Cobra Pose

  • Lie down forward facing on your mat.
  • With hands directly below shoulders, press your palms into the mat, raising up into Cobra Position.
  • Your toes are flat on top of the mat.
  • Your head stretches back. (great for a neck and chin stretch)
  • Breathe deeply up to 10 counts.
  • Lower to your elbows for a less intense version!


17.) Elbow Plank into Plank Pose

  • Lie flat, placing your elbows directly below your shoulders.
  • Curl your toes.
  • Lift your sitting bones.
  • Balance here for 10 seconds.
  • Then, place each palm directly below each shoulder.
  • Lift your torso up into Plank Pose.
  • Then, lower your torso to Elbow Plank Pose.
  • Repeat 5-25 times.
  • You can always do more counts or less counts and build up strength, or do the entire process with your knees on the mat!

18.) Crow Position

  • With palms below shoulders, walk your legs in.
  • Bend your elbows and lift one knee up.
  • Place your knee on your elbow.
  • If you feel strong and balanced, lift your other knee up onto your other elbow.
  • Hold and breathe deeply for 5-20 counts.
  • Continue lifting one knee then the other until you get stronger. Come to your hands and knees and bring each knee to your chest for 10-20 counts or rest in Child’s Pose for a less intense version of the position!


19.) Bowing Position

  • Sit on your heels, interlocking your fingers behind you.
  • Inhale, lift to your knees, lean back, and lift your palms.
  • Exhale, slowly round your shoulders, and lower your head to the mat.
  • Keep your palms pressing upward.
  • Repeat for 10-20 counts, inhaling up and exhaling down.
  • Use a pillow or chair seat to rest your head as you come down. Place your hands on your hips or lower back if interlocking your fingers is too challenging at first!

20.) Hero Position

  • Sitting on your heels, extend your knees to the sides.
  • From there, with a deep inhale walk your hands forward as far as you can.
  • If you can, lower your head to the mat.
  • Breathe deeply for 30 seconds to 1 minute.
  • Rest your head on a chair seat or pillow or lower to your elbows for a less intense version!


21.) Savasana

  • Just say ahhhh! You made it!
  • Relax here to reap the benefits of your physical practice.
  • Breathe deeply.
  • Try to imagine your wonderful new life of Godly strength!

Be strong, Be brave, Be fearless! You are never alone! Joshua 1:9

RELAXING AND UNWINDING YOGA CHALLENGE (stress relief you can do in your jammies)

Put on some relaxing music, light a candle, maybe get into your pajamas. Do whatever gives you a relaxing vibe before moving into this soothing yoga flow. Resting in your Heavenly Father’s arms, you need not worry anymore, for He says that you may cast all your cares and worries on Him. (1 Peter 5:7) He’s calling out to each of us (Matthew 11:28) to come to Him, because only He has the deep abiding rest that our bodies and souls crave. The Psalmist sums it up beautifully: “My soul finds rest in God alone” (Psalm 62:1).

During these 16 yoga positions, designed to flow into each other, try to inhale all the good and restful thoughts of our Heavenly Father’s care. Remember, He knows how many hairs are on your head this very moment (Matthew 10:30). He also loves each of us mightier than every wave in the sea (Psalm 93:4). And, His thoughts toward each of us outnumber the grains of sand in the entire world (Psalm 139:18)!

Breathe, relax, in the flow, let it go…

1.) Cross Legged Twist

  • Sit cross legged.
  • Keep both sitting bones on your mat and your chin up, shoulders down, and back straight.
  • Inhale deeply.
  • Exhale as you twist to the side.
  • Place a hand on your opposite knee, the other hand in back of you, for a more intense twist.


2.) Cross Legged Stretch Variation 

  • Clasp fingers behind your head.
  • Inhale deeply while stretching backwards as far as is comfortable for you. Let your chest lead the stretch. Keep your chin and eyes up. Let your head rest in your palms.
  • Exhale, rounding your back as you lower your head forward.
  • Press your chin into your body and  use a little pressure with your hands as you pull your head down.
  • Feel a great neck stretch and repeat the process at least 10 times.

2a.) Side Stretch

  • Simply inhale deeply in the middle and exhale as you stretch to the side.
  • Repeat the process on each side 10-20 times.
  • Inhale deeply in the middle and exhale, folding over your knee.
  • Repeat this process to each knee, 10-20 times each knee.
  • Remember to inhale in the middle with sitting bones down, chest lifted, chin up, and exhale as you move to each side.

3.) Cat/Cow Pose

  • Start with hands below shoulders and knees below hips.
  • Inhale deeply. Gently drop your head and rounding your back.
  • Exhale deeply. Arch your back with chin up.
  • Repeat the process 10-20 times. Remember to breathe!


4.) Child Pose/ Shoulder Stretch

  • Sit back onto your heels.
  • Stretch your arms out in front of you.
  • Breathe deeply for 10 counts.
  • Slip your left arm under your other arm.
  • Breathe deeply for 5-10 counts.
  • Repeat this process with your right arm.

5.) Baby Down Dog

  • From a Child Pose position, lift your sitting bones.
  • Slide your hands and arms forward.
  • Arch your back or stretch farther forward.
  • Breathe deeply for 5-10 counts.

At this point your right foot will remain forward through out exercises, 6,7,8, and 9.

6.) Low Lunge Stretch

  • From Child’s Pose, come to your hands and knees.
  • Slip your right foot between your arms.
  • Stretch your back leg out behind you as far as you can.
  • Breathe deeply for 5 counts.
  • Straighten your forward leg and fold over it.
  • Breathe for 5 counts.
  • Repeat this motion for 5 breaths in each position for a total of 10 times.

7.) Low Lunge Twist on Both Sides

  • As you go into Low Lunge Stretch, lift your back knee off your mat.
  • Place your left hand on your mat, beside your forward foot and directly below your shoulder.
  • Stretch your right arm up and twist.
  • Look up and breathe deeply for 5 counts.
  • Switch hands. Your right hand should be on your mat now, with your left hand lifted up.
  • Breathe deeply again for 5 counts.

8.) Low Lunge with Shoulder Stretch

  • Gently lower your back left knee to your mat.
  • Your right knee should be directly on top of your right foot.
  • Stay here and breathe deeply for 10 counts.
  • If you can, place your hands on your hips.
  • Clasp your fingers behind you and look up for an extra heart, lung, shoulder, neck, and arm stretch
  • Hold the stretch for a good 5-10 deep breaths.
  • Lift your wrists and arms behind you. Stretch your back leg out farther for an even deeper whole body stretch.

9.) Low Lunge Hamstring Twist

  • Release your Low Lunge Shoulder Stretch by placing your hands on each side of your right foot.
  • Place your left hand next to your right foot.
  • Bend your back leg.
  • Hold your foot and bend it toward your body as far as you can.
  • Breathe deeply for 5 counts

It is time now time to repeat positions 6,7,8, and 9 with your left leg forward and your right leg behind.

10.) Upward Dog

  • Start by lying down.
  • Place your hands directly below your shoulders
  • Press through your arms and lift your chest and head backwards (see the picture!).
  • Breathe deeply for 3 counts.

11.) Downward Dog

  • From Upward Dog Position, curl your toes, lower your head, round your back, and lift your sitting bones.
  • Your hands should be shoulder-width. Your legs should be hip width apart.
  • Keep your heels down, and keep pressing your sitting bones up.
  • Stay here until you feel a good stretch in the backs of your legs and shoulders.
  • Breathe deeply 3-5 counts.

Move into Upward Dog position and then Downward Dog position, for 3 more counts in each position.

12.) Child’s Pose

  • Sit back on your heels.
  • Lower your head to your mat, or place a pillow below your head if necessary.
  • Keep your arms back, beside your torso.
  • Let your shoulders release.
  • Widen the distance between your legs, or rest your head on your arms.
  • Breathe deeply for 5-10 counts.

13.) Rock and Roll

  • Sit with your legs forward.
  • Rock backward, then rock forward.
  • Do this for 10 counts.

14.) Butterfly Pose and Stretch

  • Sit and press the bottoms of your feet together.
  • Hold your feet,inhaling while arching your back with your chest and chin up.
  • Exhale and fold forward.
  • Repeat for 5-10 deep breaths.


15.) Reclining Butterfly

  • Lie on your back with your knees up and your arms at your sides
  • Inhale and lift your arms up over your head. Let your knees gently drop to the sides.
  • Don’t force your legs apart! Let them gently release to the sides.
  • Exhale. Close your legs and rest your arms to the sides.
  • Repeat this process 5 times.
  • Stay in the open legs position for 5-10 deep breaths.

16.) Legs Up a Wall

  • Rest your legs on a wall or a chair. Bend your legs and res them on the seat.
  • Make your sitting bones touch the wall, or get as close to the chair as possible.
  • Stay here and breathe deeply for 1-3 minutes.
  • Lie on your back, breathing deeply for as long as you like.

PEACE AND FLEXIBILITY YOGA STRETCHING CHALLENGE ( A calm peaceful yoga class of deep stretching for flexibility)

The benefits of stretching our wonderfully made bodies can be pretty incredible. Muscles loosen, blood flows, circulation improves, and our range of motion gets better. Joints, ligaments and tendons become well lubricated, while chronic pain and arthritis can actually improve over time. Stretching offers a sense of well being too. Stretching deeply and breathing deeply while you stretch helps your body release pent up stress and tension. Less stress is more peace. Peace is more calm.

Yoga is definitely a great de-stresser. But for true heart and soul peace… God tells us that it is possible to have a peace that surpasses human understanding! (Philippians 4:7) And, if we keep our minds on Him, He says He will give us “perfect peace.”(Isaiah 26:3) Even in a raging storm we can still have peace. (Psalm 107:29) Belief in what God is saying to us enables us to have what He is saying. May peace be with you, as you stretch and flex!

The ten yoga stretches below, target big muscle groups for a deep release. Simply start your stretch at the place that is right for you and take it from there. Complete this yoga workout on a regular basis and your flexibility will greatly improve. Remember that detailed instruction is always provided for every Halleluyah yoga workout, whether you are a beginner or seasoned yogi master!

1.) Cross Legged Stretch 

Sit cross legged. Then inhale deeply, stretch your arms up, and press your palms together in a prayer pose. Slowly release your arms with a deep exhale, lowering them to your mat. Repeat 10 times. If you like, on your inhales breathe in God’s peace. On your exhales, release your care worries fears and doubts to God. Don’t rush; just breathe.

2.) Side Stretch

With a big inhale, stretch your arms up once again. This time, with a deep exhale, stretch your arm to the side. Try to let your elbow drop to your mat. Stay stretching and breathing for 5-10 deep breaths.

Continue stretching to the side and extend your leg to the side. Bending your extended leg is perfectly fine. Do what is best for you! Continue stretching to the side for another 10 deep breaths.

Come back to a cross legged position. Then repeat the process on your other side.


3.) Butterfly Stretch

Press the bottom of each foot together. Pull your feet as close to your body as possible. Stretch and breathe for a few counts. If the stretch is too intense, simply move your feet forward until it feels good.

Now inhale deeply, arch your back, lift your chest, and stretch your neck and head.

Now exhale deeply, round your shoulders and back forward while stretching over your feet. Try stretching your head to your feet. Repeat the process at least 10 times with deep breathing.


4.) Wide Legged Stretch

Extend your legs to each side. Lower your torso. If possible, stretch your arms out to the sides. Breath deeply and linger in this position, which will allow you to stretch deeper. You can always keep your knees bent and and legs out to the front more than the sides if you cannot extend your legs out all the way

Try walking your hands out or lean on your elbows. 1-3 minutes in this position will seriously improve your flexibility and bring a sweet calmness to your body. You may even realize after a few minutes in this position that you can stretch a little deeper!

After you linger, stretch to each side. Try to get your face to your knee and your hands behind the bottom of each foot. Now linger here with deep breaths and then switch sides. Continue switching sides and breathe for 10-20 stretches each side.

When you are finished, release your legs and shake them out.


5.) Seated Forward Fold

Sit with your legs extended forward, with palms together and index fingers sticking straight up. Inhale deeply, stretching over your extended legs. Try to lead with your chin. Exhale, grasping your feet if you can. Bend your legs if you can’t hold them straight. Repeat the process at least 10 times. After this, fold forward one more time and stay there for a few deep breaths.

6.) Body Hug

Lie back, pulling your knees to your chest. Wrap your arms around your legs and give your entire body a big hug.

You can release your body hug and stretch out on the floor with a deep inhale. Then exhale and pull your body in again, giving it a big hug! Repeat a few more times. Lift your head if you can. Roll around in this ball if it feels good, massaging your spine and back.

If you cannot hug your knees in, bend them into your chest as far as you can.

7.) Bridge Lifts

Lie flat and bend your knees. Pull them toward your back if you can. Grasp your ankles. Inhale deeply while lifting your sitting bones as high as possible. Even one inch is a great starting place! Exhale deeply and slowly lower your sitting bones. Repeat this 10-15 times. Go slow.

When you are finished, try one more time to lift your sitting bones up. Stay here for 10 deep breaths if possible.

8.) Happy Baby Pose

Lie flat and raise your feet. Try to grasp each one or grab your ankle or calf. Then pull them down from your heels as far as possible. Breathe deeply for 10 counts. Now have some fun by rolling around while holding your feet. It will also massage your spine and back.


9.) Reclining Split Stretches

Hug your knee into your chest as best you can. Breathe deeply for a few counts.

Grasp your leg where you can and pull your knee down.

If you can, pull your foot down. Lift your head to meet your knee. Breathe deeply for a few counts.

Do the whole process with your other leg.

Remember that your current ability to stretch is perfect for you. Just keep practicing, and with consistent stretching you will see your flexibility increase!

10.) Reclining Spinal Twist

Lie back and bend your knees. With a big inhale, let your knees fall to the side. Keep your shoulders on your mat with arms extended to the sides. Breathe deeply here about 5-10 times. Come back to the middle with knees up. Repeat on your other side.

I hope you enjoyed this stretch!

Peace be with you always!

YOGA STRETCHES FOR BETTER GOLF SHOTS YOGA CHALLENGE (8 Yoga stretches with your irons to de-stress before you shoot)

Up your driving tee shot with these eight simple stretches, targeting your shoulders, arms, sides, hips, waist, abs, core and more! Breathe deeply as you stretch into each one.  It will relax your muscles and allow for a deeper stretch. Breathing deep and steady will also relax your mind, allowing clarity and focus as you warm up for that perfect first shot!

All of these stretches require your driver to accompany you! Remember to take each one slow and always remember to breathe! I know from experience that golf can be quite a mind game. Focusing all your attention on your breathing and these stretches instead of allowing yourself to tense up before that first shot can really do wonders to up your game! 

1.) Driver Stretches

Take your driver and lay it on your shoulders behind your head. Relax your forearms upon it. Feel your shoulders and arms open up. Give yourself a few deep breaths in this position. It will relax your upper body and allow you to stretch even deeper.

2.) Driver Side Stretches

Let your driver slide down your left shoulder and arms. Follow the driver and stretch to your side. Hold the position  while breathing deeply again. Look up for a deeper stretch. Repeat the stretch on your right side. Do this on each side 4-5 times and don’t forget to breathe!

3.) Driver Twists

Hold onto your driver where it is a comfortable stretch for you. Your legs can be hip width apart or stretched a little farther to the sides, depending upon what feels good for you. Gently twist to the right, then gently twist to your left. Repeat the twist 5-10 times on each side.

4.) Driving Stretch and Lift

Take your driver and inhale deeply, stretching it over your head. Slowly lower it while exhaling. Lower and lift in the same manner up to 10 times.

5.) Driving Side Stretch

Take your driver, inhale deeply, and lift it up again. Exhale deeply as you stretch over your hips to the side. Repeat this by inhaling in the middle with the driver up over your head; then, exhale deeply as you stretch over to each side for a total of 5-10 times.

6.) Driving Forward Stretch

Stretch and lift your driver up once again while slowly inhaling. Slowly exhaling, gently bend forward. Lean only as far as you feel comfortable.You may bend your knees for added support and balance. Hold this position for a few breaths and lift back up to the starting position. Repeat for a few more stretches. Leading the stretch with your chin will increase the intensity of the entire exercise!

7.) Triangle Driving Stretch

Widen your stance about two and a half feet apart. Point your toes to the right side with your right foot. Slightly point your left foot in. Keep both heels on the same line. Lay your driver down for support. Hold it while leaning up and over to the side. Your face should be able to look forward. Slowly lower your hands until you feel a nice stretch. Hold this position with a few deep breath to relax and allow for a deeper stretch.

8.) Driving Warrior Stretch 

From the same leg and foot positioning as the Driving Triangle Stretch, simply bend your forward knee. Step in for a less intense stretch. Then, take hold of your driver and slowly lift it up and over your back. Go slow and be gentle as you raise it over your head. If you find it a challenge at first, simply position your driver without raising it at first to gain familiarity with the stretch.

Look up and bend your forward leg a little more for a more intense stretch. Come out of the stretch and get back in it a few more times. Try to remember to breathe; it will help you release your muscles so you can stretch farther!

TAE-KWON-DO CHALLENGE ( Tae-Kwon-Do to help you feel strong and courageous)

Don’t give in. Don’t give up. And don’t give out! These are not options! Instead,

Be on guard, stand firm in the faith. Be courageous. Be strong.

1 Corinthians 16:13

Fortunately for us, black belt and yoga enthusiast Kelly has demonstrated a bit of Tae-Kwon-Do while Halleluyah Yoga’s mascot, Boomer, looks on!

The point of this yoga segment is to allow these physical stances of guarding, blocking, and striking to remind you of how courageous you are and the strength you possess as you meditate upon God’s mighty words!

1.) Standing Stretch

Let’s ready ourselves with strong blocks and strikes by thinking only on God’s empowering thoughts while we stretch.

Stand tall with your feet together.

Stretch your arms over your head with a huge inhale. Relax them with a huge exhale by your sides.

Repeat 5-10 times.

Remember to pull your abs in, stretch up and out of your waist, keep your shoulders down, neck long, chin up, face relaxed and rest your biceps beside your ears.

2.) Crane Stance

From a Standing Stretch with toes pointing forward, hop back (approximately one foot) unto your right foot. Your toes will face the right side of the room.

At the same time, bend and lift your left leg. You are preparing you for an incoming strike. By sliding your left toes behind your right knee, you will be increasing the support to your Crane Stance block.

Make fists with both hands and lift your right arm for an upward block; lower your left arm for a low block. Tense up the arm muscles for a stronger block.

Take a few huge breaths as you hold this powerful block.

Congratulations! You got out of the way of an incoming strike by hopping back and readied yourself for more.

3.) Warrior II Crane Block

Step forward with your right leg or the leg that was lifted during your Crane Stance, and bend into a Warrior II Pose. Your front arm slides in front of your waist, while your back arm slides just over your head. Press your fingers together and bend your thumb into your palms on both hands for added strength. Hold for 5-10 deep breaths.

Congratulations! You are ready for any incoming high or low block!
3.) Closed Hand High Block in Horse Stance 

Turn your forward left foot inward, and do the same with your right foot. Bend both knees into a Horse Stance. Raise both arms into a Closed Hand High Block just above your head. Tense your arms and squeeze your fists for added strength to your High Block Horse Stance.

Congratulations! You have blocked an incoming strike to your head!

4.) Open Hand Middle Block

Remain in a Horse Stance. Open your arms to the sides. Tense your arms and turn your fists up while squeezing your fingers together while bending your thumbs and pressing them into your palms.The block should end just below your chin and slightly beyond your ribs.

Congratulations! You are blocking a side strike or giving a side strike. You decide!

5.) Supported  Spear Hand  

Remain in a Horse Stance. From an Open Handed Middle Block, quickly straighten your right arm while your left arm quickly slides under to support it. Tense your arm muscles as you practice these moves to increase strength in your blocks and your strikes. Remember to press fingers together while bending your thumbs and pressing them into your palms.

Congratulations! You blocked and you striked!

Now, repeat all five exercises with your other leg forward!

Never forget you are more than a conqueror!

live strong in God and yoga on!

xxoo

<3

PARTNER YOGA MEDITATION CHALLENGE

Seek Divine guidance everyday to find inner strength so that the world will not blow your candle out!

Let the words of my mouth and the meditation of my heart be pleasing in your sight, Oh Lord.

Psalm 19:14

Grab a partner and let’s get started! Remember through out this meditation that nothing is required of you – You are already qualified according to your Heavenly Father!

1.) “YOU”…are LOVED!


 1.) Cross-legged  Partner Meditation 

Sit crossed legged next to your partner in a position of your choice.

Close your eyes. Take a moment to clear your head of any thoughts by focusing on a few deep breaths. When you are ready, say these incredible Bible verses out loud together.

After 10 repetitions, take those Bible verses internally – make them your own. Believe that these beautiful words are yours from your Heavenly Father, because it’s true. Think, focus and reflect upon them while breathing deeply.

Before I formed you in the womb I knew you. Before you were born I set you apart.

Jeremiah 1:5

I have loved you with an everlasting love.

Jeremiah 31:3

Yesterday, He loved you, today, He loves you, tomorrow He will love you, nothing will change.

Hebrews 13:8

These amazing words describe His love for you. You have nothing to do. Just believe!

2.) “YOU”…are a Beautiful Masterpiece and your worth is far above rubies!

2.) Seated Spinal Prayer Partner Twist

You and your partner sit with your legs out in front of you.

Each person may gently bend their outside leg and place it over their inside leg. Hug your outside leg into your body and place your foot over your thigh, and on the ground, for deeper twisting benefits.

Press each of your outside palms together in a prayer position.

When you and your partner are ready, begin saying these awesome Bible verses out loud together 10 times. These beautiful words are meant for you – know that you “are” these words to your Heavenly Father.

The King is enthralled with your beauty: Honor Him, For He is your Lord.

Psalm 45:11

You are God’s Masterpiece.

Ephesians 2:10

Your worth is far above rubies.

Proverbs 31:13

Let God define you. He says you’re awesome! Now repeat the entire Partner Yoga Meditation on your other side!

3.) “YOU” …can give away your problems, be taken care of  and have peace!

3.) Extended Leg Spinal Twist With Partner

Each partner sits up tall with your backs touching and legs extended forward.

The partner on the left pulls their left knee into their body. The partner on the right pulls their right knee inward.

The partner on the left stretches their right palm across their body. The partner on the right stretches their left palm.

Bring your palms together.

When you and your partner are ready, begin saying these magnificent words together 10 times. Then while breathing deeply, continue to give up your problems to the one who truly cares and can definitely help.

Give your burdens to the Lord and He will take care of you.

Psalm 55:22

Give all your cares and worries to God because He cares for you.

1 Peter 5:7

You will keep in perfect peace all who trust in you, all whose thoughts are fixed on you.

Isaiah 26:3

Peace I leave with you; my peace I give to you. I do not give as the world gives. Do not let your hearts be troubled and do not be afraid.

John 14:27

Leave the thoughts you gave your Heavenly Father with Him. They are His now! Repeat the entire Partner Yoga Meditation on your other side!

4.)  “YOU” …are strong, empowered, more than a conqueror, and victorious!

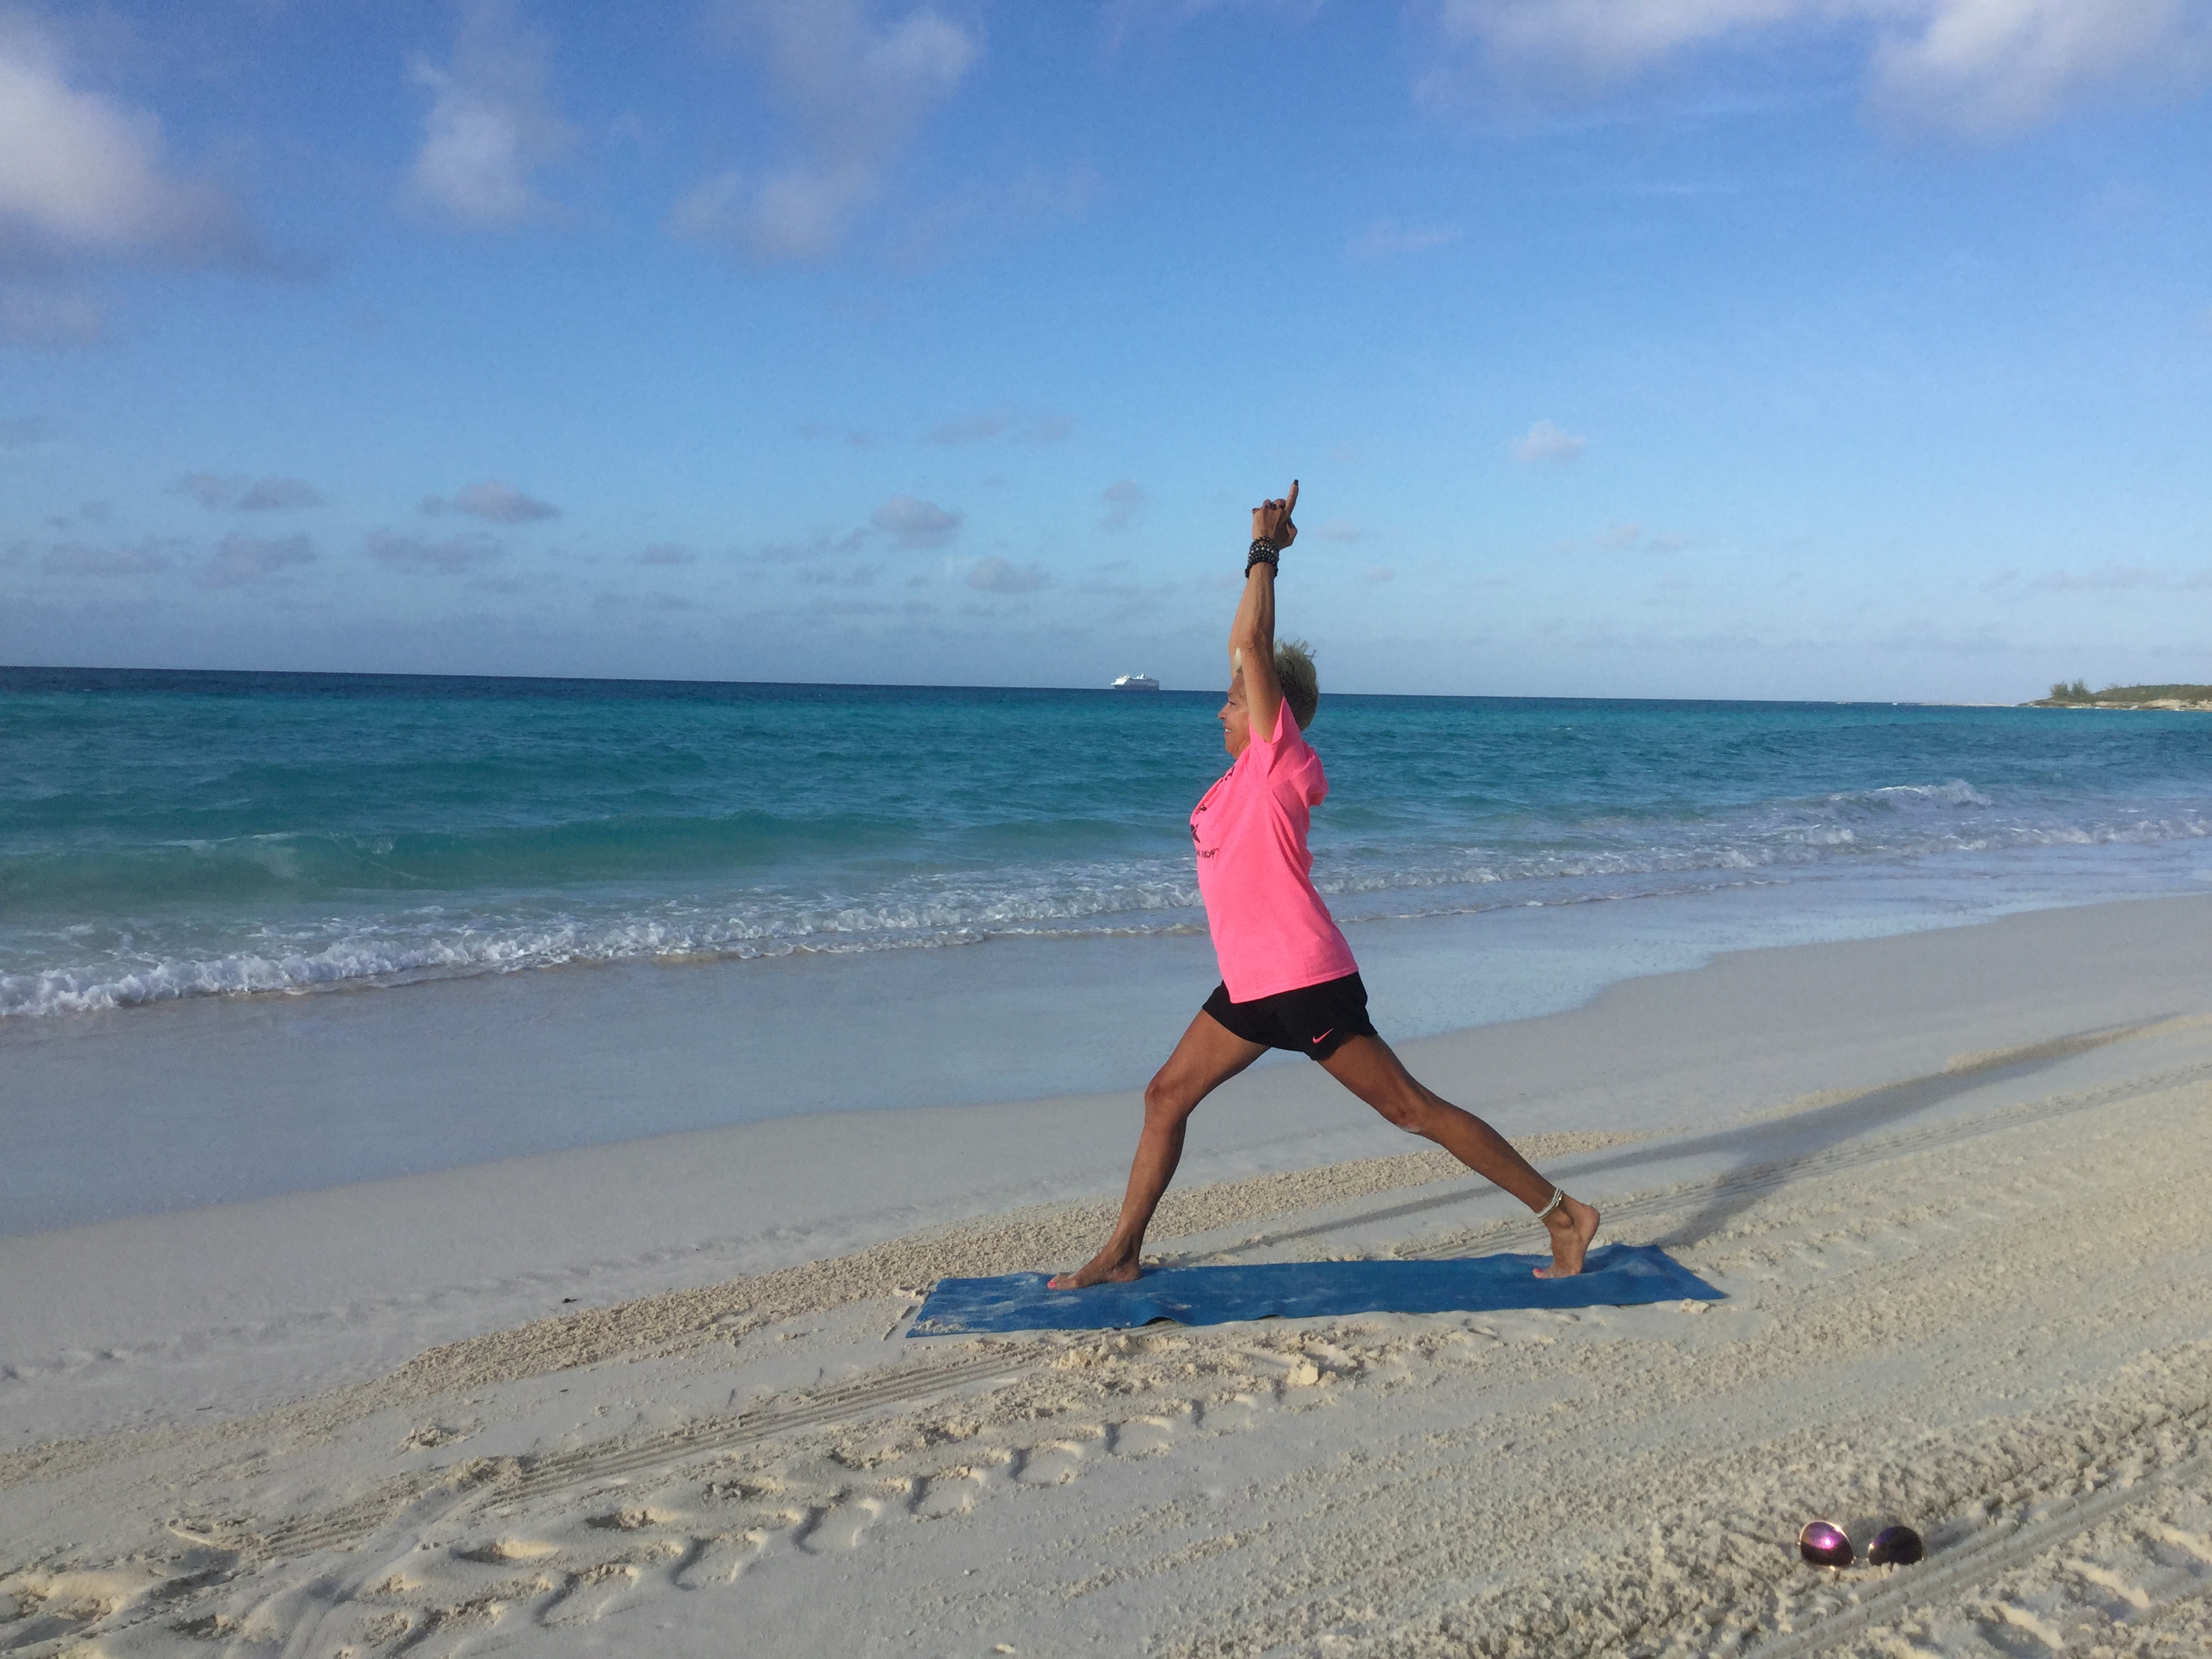
4.) Conquering Warrior 

Stand facing one another.

Step forward with opposite legs, bending knees into Warrior I Pose. Step out farther for more of a challenge or step in for a less challenging position. Stretch arms forward, meeting your partner’s arms. Press your palms together.

When you and your partner are ready, begin saying these awesome Bible verses out loud together 10 times. You are already strong. God has already equipped you. You are victorious – you just need to believe that you are. You are not only a conqueror, but more than a conqueror, invincible! Dwell here, reflect, ponder, and own these words, mighty warrior!

I can do all things through Christ who strengthens me.

Philippians 4:7

The Lord is with you mighty warrior.

Judges 6:12

We are more than conquerors through Him who loved us.

Romans 8:37

Switch legs and do the entire process with your other leg forward. Live invincibly with these words deep in your heart!

5.) “YOU” …are near to God, heard by God, your prayers are important to God, and you can actually come to His throne of grace whenever you need to!

5.) Praying Warrior

Both partners stand stall, shoulder to shoulder.

Each partner steps out to the side. Bend each outside leg into Warrior II Pose. Press your palms together.

When you and your partner are ready, begin saying aloud these comforting words 10 times. Then call upon God for what you may need in this very moment. Dwell, reflect and linger here.

The Lord is near to all who call on Him.

Psalm 145:18

Tears are prayers too. They travel to God when we cannot speak.

Psalm 56:8

Let us therefore come boldly to the throne on grace in time of need.

Hebrews 4:16

You can tell God everything -He already knows it all, but I’m pretty sure that He loves it when you tell Him!

6.) “YOU” can help, encourage, inspire and love each other in mighty ways! 

6.) Encouraging Partner Tree

Both partners stand tall, shoulder to shoulder.

Each partner raise your outside leg. Place it upon your inside thigh. You may place it where it is comfortable for you – your ankle, calf, and knee is okay too!

Raise the arm closest to your partner. Press your palms together. Then press your other hand’s palms together. Help one another stay up in a Tree Pose as you say these words aloud together. After 10 times, breathe deeply, reflect, be encouraged, and loved by God’s Words…

Let us think about each other and help each other to show love and do good deeds.

Hebrews 10:24

Encourage one another and build each other up.

1 Thessalonians 5:11

For where two or three come together in my name, there I am in the midst of them.

Matthew 18:19

Switch legs and repeat the entire process. Keep each other up and don’t let each other fall. Let God’s words come alive in your poses and in your lives!

Be seated together and offer up your Halleluyahs!

do yoga and meditate on

…let me know how it goes…

xxoo

<3

HOW YOGA AFFECTS YOUR BRAIN

The threat of Alzheimer’s Disease sometimes creeps around in my head. More and more people are being diagnosed with it and we hear more about it with each passing day. Multiply all that with the fact that my Dad and his two sisters suffered with the disease for many years, and one can’t help but shiver. That’s probably the reason why the brain is so fascinating to me. Though as small as a grapefruit, it stores all the information of what makes You, You! That’s why we gotta keep our brains in tip top shape. Eating, moving, thinking, and exercising all have a part in promoting a healthy brain. However, Scientists are discovering that yoga can help too.

It turns out that the happiness we feel after yoga class isn’t just in our head. Using brain scans, scientists can now prove that yoga actually changes our brain chemistry. Sat Bir Singh Khalsa, Ph.D., an assistant professor at Harvard Medical School, has spent more than a decade gathering research on yoga and its scientific effects on the mind. In his book, Your Brain on Yoga, he outlines what really happens in that head of yours after an hour of a Vinyasa flow.

1.) Your brain gets flooded with feel-good chemicals.

During yoga, your levels of gamma-amino butyric acid (GABA) spike up significantly. After three studies, they found the chemical GABA rose in the yogis by 27%. This chemical is associated with decreasing anxiety and improving moods.You also get dopamine and serotonin, chemicals that help you feel more relaxed and ready to handle stressful situations.

2.) Your cortisol levels drop.

Cortisol is the VIP  hormone that helps your body respond to stress. When you are stressed, it activates the brain amygdala, also known as the fear center, and shrinks the pre-frontal cortex, which manages self control and discipline. After a comprehensive test in Germany, scientists discovered that even the subject’s saliva contained less cortisol after just one yoga class. The hormone cortisol is also responsible for regulating a wide range of processes through your body, so it is imperative that it stays in check.

3.) Your brain even grows in size.

It’s safe to say that your brain has alot to gain from bending and stretching. Using MRI scans and control groups found that with yoga practiced during the week, certain areas of the brain were enlarged. The mental map of your body, the somatosensory cotex (stress) and the hippocampus (the anxiety and stress reliever) were both larger in the heads of yogis compared to those that did not hit the mat. Other areas, which help you concentrate and enhance a greater self image, grew in size as well.

4.) The gray matter density in your brain changes.

The gray matter in your brain is part of your nervous system. It’s main duties are taking care of muscle control and sensory perception like hearing, seeing, and remembering. After a 2 month long test, using a combination of yoga and meditation at Massachusetts General Hospital, Harvard researchers determined that the part of your brain that lowers stress had a much denser gray matter. These changes in gray matter they stated, encouraged people to relax more and be able to enjoy life in general.

5.) Improves your neural processing or sharpens your memory.

Cortical folding, known in the medical community as gyrification, occurs in the cerebral cortex when you meditate and do yoga on a regular basis. The more folds you have, the better your neural processing is. Researchers found that gyrification might even offset age-related cortical thinning. That means you could keep a youthful brain much longer. Sharper and a more youthful brain by just doing yoga? I’m in!

6.) Your parasympathetic nervous system is activated. This chills, calms and relaxes you!

The parasympathetic nervous system is the “rest and digest” part of your body. Activated, it relaxes your brain and sends you into a “chill out” mode. Blood is directed toward endocrine glands, digestive organs, and lymphatic circulation, while your heart rate and blood pressure are lowered. It is the opposite of the flight or fight (sympathetic) nervous system response.

Even more fascinating than our brains on yoga is the one who actually created our brains. Though doctors and scientists have been studying the brain for a long time, much of the brain still remains incomprehensible. However, our Heavenly Father knows everything about us because He created us. He didn’t just leave us to figure out how to maintain the best possible lifestyle either. He gave us verses of Scripture in maintaining our health from the inside out, with all of His Power and strength from Heaven above.

You made all the delicate, inner parts of my body and knit me together in my mother’s womb.

Psalm 139:13

What ever is true, what ever is noble, what ever is honest, what ever is just, what ever is pure, what ever is lovely, what ever is commendable, what ever is excellent…if  anything is worthy of praise, think on these things.

Philippians 4:8

Haven’t you known?

Haven’t you heard.

The everlasting God, The Lord, The Creator of the ends of the world, doesn’t faint.

He isn’t weary.

His understanding is unsearchable.

He gives power to the weak.

He increases the strength of him or her who has no might!

Isaiah 40:28-29

“Halleluyah!”


TREE POSE EXPERIMENT MINI CHALLENGE ( 3 Tree pose postures for improving focus and balance both on and off the mat)

Approaching hard movements with ease on our mats enables us to take a calm approach to hard situations in life. Of course, there will always be stresses and challenges in life, but what matters most is how we respond to them. Then we can apply what we learn and move forward with grace and peace.

I have designed a quick and simple Tree Pose experiment to help each of us discover, in our own way, just how we measure up to the challenges of life. The experiment will also help us to focus, build strength, and help with better balance, enhancing our entire yoga practice as well as our daily life.

Below you will find 3 Tree Pose variations, all of which involve balancing on one leg without putting your foot down.

Remember to breathe. Also remember that:

Life is 10% of what happens to you and 90% of how you react to it.

Charles Swindoll

and

What consumes your mind controls your life.

Proverbs 4:23

For best results on and off our mat, let us focus on God and not our circumstances. Fixing our eyes on the prize will provide true, lasting health and wellness!

1.) Praying Tree Pose

Slide your left foot as high as you can up your right leg. Stand tall with your shoulders down, neck long, stomach pulled in and palms pressed together. Keep your head forward and your eyes locked on an object in front of you – it doesn’t matter what it is, just focus on it. Keep a steady breath and do not look to the sides. Hold this pose for 10-30 seconds, or 1-3 minutes for more advanced yogis.

To make all these exercises easier, place your foot on your ankle, calf, knee or lower thigh.

Do not move. Proceed to number two, High Praying Tree Pose.

2.) High Praying Tree Pose

Do not lower your leg. Once you feel comfortable, slide your hands up over your head. Hold this pose for 10-30 seconds, or 1-3 minutes for more advanced yogis. Do not move again. Proceed to number three, Eagle In a Tree Pose.

3.) Eagle In a Tree Pose

Once you have completed step 1 and 2, begin number 3 by holding your arms out in front of you with bent elbows. Now slide your left hand under your right elbow. Then swirl it up your arm until your palms meet (or as high as it will go). Hold this pose for 10-30 seconds, or 1-3 minutes for more advanced yogis.

A few questions we can ask yourselves once we have completed the experiment:

What did we focus on?

Where were our eyes?

Did we move our heads?

Did we move with ease or did we wobble, sway, lower our foot, or fall?

Did we keep a steady breath?

Did we hold our breath at any time? If we did, then when?

When we thought of moving to the next position, what happened?

Was it hard to be still?

Did we focus on how hard or easy it was?

Did we focus on everything around us?

If you enjoyed this experiment, up the challenge by doing it in the middle of busy places. Try to stand on rocks on the shore with waves flowing in and out. How about in the office, airport, church, library, party, sidewalk, or park? You choose! Perhaps you will see how you react to stress when it comes along.

keep calm

and yoga on!

xxoo

<3

STRETCHING YOGA CHALLENGE

Join me in this quick stretch to loosen up your tense muscles and get a new perspective on stretching!

If we are willing, we can stretch ourselves to achieve great things – but God has better for every one of us!

Trust in the Lord with all your heart and lean not unto your own understanding.

Proverbs 3:5-6

For with God nothing shall be impossible.

Luke 1:37

Do you remember? Peter walked on water. Sarah gave birth at age 90. Mary was a mother with out knowing a man. Jesus’ disciples fed over 5,000 people from one kid’s lunch. Moses parted the entire Red Sea for the Israelites to cross. Little boy David killed an armored giant with a stone. Daniel a slept all night in a den of lions. Deborah saved a nation. The list goes on!

Though the people of the Bible were just normal people, they did amazing things! But they had one thing in common: they were stretched! Day by day, year by year, little by little, God stretched their faith. At the point when they were fully able to rely on Him, God blessed them; they accomplished above and beyond what they could possibly imagine!

Now is your opportunity to go deeper in your yoga practice with these Asanas below. Remember to breathe deeply, this will relieve stress and tension, allowing you to stretch deeper. I know God is stretching me – where might God be stretching you?

1.) Standing Stretch

Start by standing tall with your abs pulled in, your butt tucked under, your chest lifted, your shoulders down and your neck lengthened. Lift your arms to the sides, inhale deeply, and stretch them up. Exhale deeply and lower your arms. Repeat 5-10 times, depending on how much time you have.

2.) Forward Bend

In this stance, when you exhale down, extend your torso over your legs. Whereever your hands land on your legs is the perfect place for you. Once you feel comfortable in the Forward Bending stretch, put your left hand near, in front of, or touching your right foot. Stretch your right arm up and gently twist. Repeat on your other side. Stretch each side 5-10 times.

To make it slightly easier, bend your knees. You can also play around with your legs by bending each one separately.

Do number 3-8 with your right leg forward. Then do number 3-8 with your left leg forward.

3.) Intense Pose Reverse Praying Hands

Extend your right leg to the side with your toes pointed. Slightly turn in your left toes. Press your palms behind your back in a praying positio,n lifting the palms as high up your back as you can go. Stretch your entire torso back with a deep inhale. With a deep long exhale, extend your torso out and over your front leg. Lead with your chin. Stretch as far as you can go in this position.

You can always step your back leg in to make it easier, or slightly bend both legs. You can also place your hands on your hips, or clasp your wrists in back instead of the reverse prayer hold.

4.) Intense Pose Stretch

Once you can no longer hold the Reverse Prayer Position, release you hands and stretch deeper over your leg. Try to get your head to touch your knee and breathe deeply, for up to 10 counts.

Step your back leg in for less intensity and slightly lean forward to make this pose less challenging.

5.) Deep Lunge Pose

Bend your right knee. Place your hands on your mat on each side of your foot. Step your back leg in for less intensity, or place your knee on your mat. Breathe deeply for up to 10 counts.

You can always bend your back leg for less intensity or place your hands on your thigh.

6.) Lunge Pose Twist

Raise your right arm and look up. Stretch that body. Hold for 5-10 deep breaths.

Bend your back knee if it becomes too challenging.


7.) Deep Lunge Stretch

Drop your back knee to the mat. Stay here and breathe deeply for up to 10 counts. If you can, grasp your foot; stretch and hold this position for 5-10 breaths.

Take it farther by lifting your forward arm up and pulling your foot to meet your sitting bones. Breath 10 long and deep breaths again!


8.) Bended Knee Prayer Position

Place both your hands on each side of your foot and slide your knee below your sitting bones to come out of the intense stretch. Then bring your palms together. You are ready to pray!

Sit and breathe for a few moments. Enjoy the rewards that any kind of stretching can bring!

Let me know how it goes…

yoga on

xxoo

<3