YOGA CHALLENGE FOR BUILDING STRONGER KNEES AND A CALMER YOU!

If you need to strengthen your knees, or your up to your knees in the cares and worries of this life, then this yoga challenge was made for you!

Calming both the nervous system and the overworked mind is a timed breath. When your exhale is even a few counts longer than your inhale, the vagus nerve (running from your neck down through your diaphragm ) sends a signal to your brain to turn up your parasympathetic nervous system.When your parasympathetic nervous system is dominant your breathing slows, heart rate drops, and blood pressure lowers as your blood vessels relax and your body is put into a state of calm and healing. The first exercise below will help you.

Many studies have also shown that meditation helps relieve our subjective levels of anxiety, depression and improves our attention, concentration and overall psychological well being. It is also beneficial for our brains too.

There are many Bible verses that call us to meditate upon God’s word. God promises to help us when we ask, think, and reflect upon what he says. Joshua 1:8-9 and  Psalm 1:2 are just a few for further reading on the benefits of meditating on God’s word.

It is not required of you but if you like, for the purposes of this yoga sequence, we will meditate upon God helping us in these chosen Bible verses.

The Psalmist was heavy in the deep waters of affliction, Psalm 16:18.

He reached down from Heaven and rescued me; He drew me out of deep waters.

And, further, Isaiah 41:13.

For I am the Lord, your God who takes hold of your right hand and says to you Do not fear, I will help you. 

When you are ready, grab a mat, towel, and some water and let’s get started!

  • Sit on your heels or find a comfortable position.
  • A rolled up towel or a yoga block may help you to sit on your heels.
  • Close your eyes and inhale slowly for 5 long counts. Exhale slowly for 8 long counts. Repeat for 5 minutes.
  • Continue to extend your exhales longer than your inhales for the next 8 yoga positions.

1.) Seated Knee Stretch

  • Extend your arms out to the sides.
  • With a deep inhale, slowly raise your arms into a prayer position above your head.
  • Exhale deeply, lowering your right arm and stretching to the right side.
  • Repeat for 10 counts, inhaling in prayer position overhead and exhaling to each side.

2.) Child’s Pose Stretch

  • Walk your hands forward into Child’s Pose for 10 deep breaths.
  • You can always roll up a towel if sitting on your heels gives you trouble!

3.) Knee Stretch

  • Lay the top of your feet to the floor (or a rolled up towel), approximately hip width apart.
  • Lift your torso.
  • Press your hips forward and try clasping your hands behind your back. Place your hands on your hips if this is too challenging.
  • Lift your arms behind you while lifting your chin. Be gentle and take it slow. This will automatically make you arch your back.
  • Slowly round your back, tuck your chin and lower your torso into a Child’s Pose.
  • Keep your arms clasped behind you for a deeper stretch.
  • Repeat 5-10 times.

4.) Bended Knee Twist

  • On both knees, step your right foot forward.
  • Your forward foot toes are directly below your knee.
  • Your back knee is directly below your hip.
  • Press your hands into a prayer position.
  • Take a big inhale. Exhale slowly, twisting over your forward right leg.
  • Exhaling while twisting allows more space for you to twist.
  • Breath deeply for 3-5 counts and repeat the twist a few more times.
  • Repeat with your left leg forward.

5.) Squat Pose

  • Be gentle and take it slow. You may use a rolled up towel or yoga block under your heels. With feet hip width and toes slightly pointed outward, lower your torso.
  • Press your palms together in a prayer position with your elbows on the insides of both thighs.
  • Breathe deeply for 5-10 longs deep breaths.
  • Squat Pose is a wonderful hip opener and bowel mover; it aids with digestion too!

6.) Butterfly Pose

  • Sit on your mat with the bottom of your feet pressed together, especially your heels.
  • For a deeper stretch, pull your feet close to your body. For a lighter stretch, move them forward.
  • Inhale, lifting your chin while pulling your stomach in. Your chest should lift, which will engage your shoulders to arch your back.
  • Exhale deeply, rounding your shoulders and tucking your chin while leaning forward.
  • Repeat 5-10 times with inhales stretching back and exhales rounding forward.
  • Butterfly Stretch loosens your hips and sets you up for the next position.

7.) Extended Legs Side Stretch

  • Extend both legs to your sides.
  • Stretch them wider for a deeper stretch, and less for a beginner stretch.
  • Inhale slowly, extending both arms out to your sides, and up over your head in a prayer position.
  • Exhale slowly, stretching over to your right side.
  • Tuck your elbow inside your inner thigh for a deeper stretch.
  • Place your hand on your toes for a deeper stretch
  • You will be stretching and strengthening your entire leg, hips, and sides in this stretch.

8.) Cow Pose

  • Sit up tall; pull your stomach in.
  • Bend your left leg and place your right foot over your left leg.
  • Allow your bent knees to meet in the center of your torso.
  • You may, very gently, pull each of your feet back. This will align your knees to be on top of one another.
  • Push your feet forward if this is too difficult.
  • Press your palms together and breathe deeply for 5-10 counts.
  • Repeat on the other leg,while breathing for 5-10 counts.
  • Be very gentle while getting into this position. Although this pose looks easy, it can also stretch your knees too far as I found out first hand. I have been suffering with an over stretched back of the knee for 10 weeks off and on!

I hope you enjoyed this yoga sequence and it helped you to lighten the load you have been carrying. If you have any question or comments please message me. I would be delighted to help you!

God Bless!

xxoo

TREE POSE MINI YOGA CHALLENGE (improve balance, focus & brain power)

Soon the trees will be arrayed in their gorgeous fall wardrobe! As diverse as their many colors, I love the way yoga poses heal and help us. Take the simple and basic Tree Pose. Studies have shown that the practice of Tree Pose improves balance and coordination, helping us to build a firm foundation so we won’t fall over so easily in life. Tree Pose also boosts brain power. The nerve endings in our feet communicate with our brains to create new neural pathways that establish stability on one leg – much like a tree, in fact!

Tree Pose

Spread your toes wide on your right leg.

Focus on an object directly in front of you for.

With both of your hips facing forward, place your left leg on the ankle of your right leg. If possible slide it to your inner thigh.

Keep your shoulders pressed down, with your palms pressed together in front of you. Lift them up over your head if your feeling balanced.

Breathe deeply in Tree Pose for 10 long inhales and exhales.

Repeat the process while balancing on your left leg.

It’s okay to sway, and even fall. Just get back up and try again. Your building strength, balance and coordination with every moment that your standing on one leg.

Thanks for practicing Tree Pose with me! May you find the beauty of the trees this fall to be spectacular! See you next month 🙂


YOGA CHALLENGE IN THE PORT OF HAVANA, CUBA (be blessed with less stress)

Welcome to beautiful and elegant Veendam, a ship of Holland America Line! On this lovely day, we docked at the magical port of Havana, Cuba. Join me for this hip, shoulder and heart opening yoga challenge with poses that will boost your core, soothe your spine, and build strength in your legs.

Let this time be for you to unwind, relax and release your cares and worries.

Enhance the stress-relieving benefits of this yoga challenge by turning any worries that you have into prayers.

Don’t worry about anything; instead pray about everything!

Philippians 4:6

If you would like before we get started join me in this prayer.

Dear God,

My mind can hardly fathom the depth of your love for me.

You know every hair on my head.

You flung the stars into place.

You plan every step that I take.

When my anxieties overwhelm me, You tell me to relinquish my cares into your hand.

The hand that created the stars.

The hand that created the hair on my head.

The hand that holds my future.

I can now trust that all that causes me stress you will take care of. I now place all my stress into your mighty loving All-powerful hands!

In your name I pray, Amen!

What is important here is to concentrate through-out this challenge on your inhales and your exhales as you move in and out of each position. If you like, each time you press your palms together offer up a prayer of thanks.

When you are ready, grab a mat and a towel – let’s get started!


1.) Standing Prayer Stretch

  • Lengthen your body by pulling your belly in. Push your shoulders down and tuck your tailbone in.
  • Keep your feet together.
  • Inhale, extending your arms out to your sides and pressing your palms together in prayer position over your head.
  • Exhale, bringing your praying hands to your heart.
  • Repeat this up to 10 times with deep breaths.

2.) Goddess Prayer Pose

  • Extend your legs to your sides (approximately 3-4 feet wide), and bend your knees.
  • Slightly turn your toes outward.
  • Inhale, straightening your legs and extending your arms out to your sides. Press your palms together.
  • Exhale, bending your knees while bringing your praying hands to your heart.
  • Repeat up to 10 times.

3.) Tip Toe Extended Leg Squat

  • Shift your weight onto your left leg while extending your right leg out to the side.
  • Use your hands for support.
  • Press your palms together in prayer pose.
  • Breathe deeply for 5 deep breaths.
  • Say a prayer if you like.
  • Repeat with your other leg.

4.) Squat Pose Variation

  • Stand with your feet directly below your hips.
  • Bend both your knees while gently lowering your body.
  • Keep your elbows pressed on the inside of your thighs.
  • Press your palms into a praying position.
  • Breathe deeply for up to 10 counts.
  • Extend your right arm up and breathe deeply 5 times.
  • Bend your torso forward while wrapping your right arm around your right leg.
  • Clasp your hands behind your back and breathe deeply for 5 counts.
  • Repeat this, wrapping your arms around your other leg and breathing deeply.

5.) Sphinx Pose with a Half Frog 

  • Lie face down.
  • Gently raise your chest and chin up; extend your head back.
  • Press your elbows into the mat and keep them directly below your shoulders.
  • Press the tops of your feet into the mat.
  • Breathe deeply while holding this position for up to 10 counts.
  • Now bend your right leg and breathe deeply for p to 10 counts.
  • If possible, gently stretch your thigh by wrapping your elbow around your foot.
  • Stay here while breathing deeply, up to 10 times.

6.) Down Dog/ Three Legged Dog

  • Start on your hands and knees.
  • Place your hands below your shoulders and your knees below your hips.
  • Tuck your toes, press your palms into your mat and lift your sitting bones.
  • Press your front thighs back into your calves while pressing your heels evenly into your mat.
  • Roll your biceps upward to create space between your shoulders and your ears.
  • Resist the urge to look forward and keep your neck relaxed.
  • Breathe deeply for 10 counts.
  • Lift each leg into Three Legged Dog, inhaling as you raise each one up and exhaling as you lower each one for a total of 5-10 times on each leg.
  • For an easier version, simply remain on all fours extending each leg out behind you for a modified Three Legged Dog.

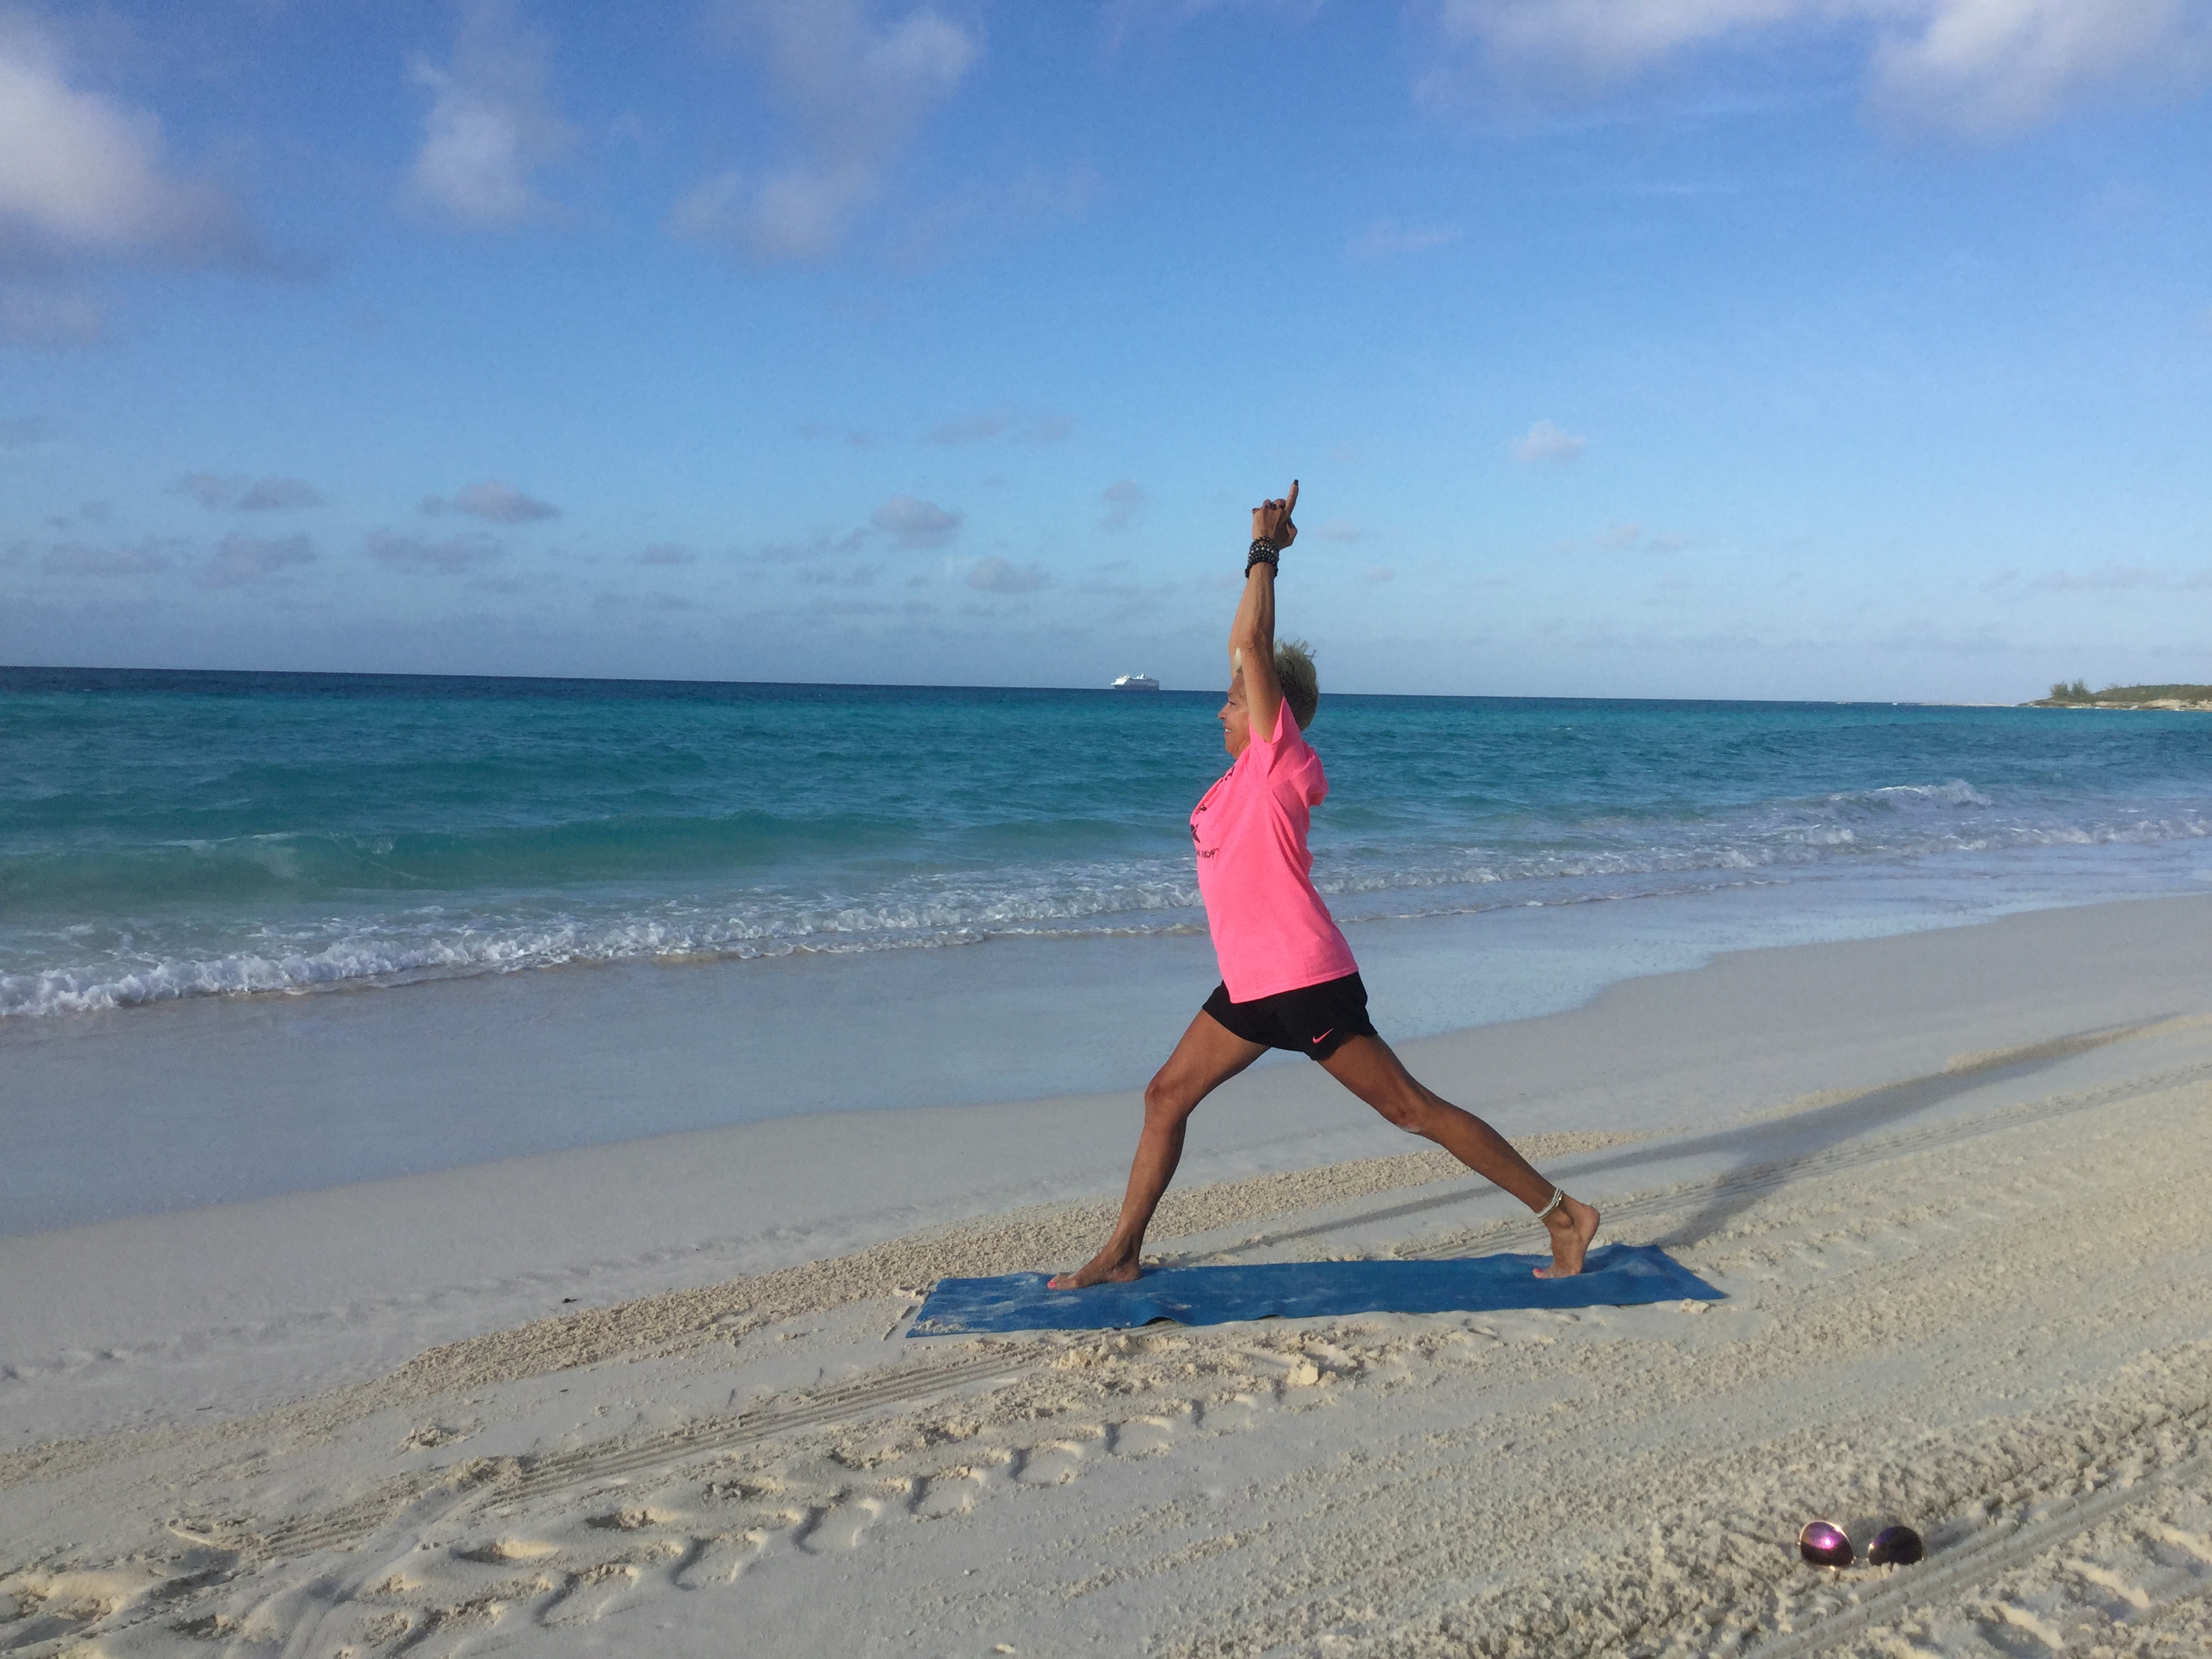
7.) Warrior I With Eagle Arms

  • Step forward 2-3 feet, with your left foot. The longer the step, the more difficult the pose will be! That also applies to the width between your legs; hip width is optimal.
  • Turn your back heel out slightly.
  • Do not extend your knee beyond your toes.
  • Keep your torso and hips facing forward.
  • Keep your back straight and pull your stomach in.
  • Extend your arms forward. Place your left arm under your right elbow. Continue wrapping your left arm up and around your right arm.
  • When your palms meet, lift this hand position and arch your head back, breathing deeply for up to 10 counts.
  • Repeat with your right leg forward. Then, place your right arm under your left elbow. Continue wrapping your right arm up and around your left arm. Also breathe deeply up to 10 counts.

8.) Low Lunge Shoulder Stretch

  • Lower your left knee down from a Warrior I position.
  • Keep your knee above your toes.
  • Place your hands behind your back and clasp them.
  • Look up and arch your head back, breathing deeply for up to 10 counts.
  • If possible, lift your arms up behind you and breathe deeply here for 10 counts.
  • Repeat with your right leg forward.

9.) Lizard Pose

  • From Lunge Position (like #8, above), lower your hands and then your elbows to your mat on the inside of your thigh.
  • Keep your forward knee on top of your foot.
  • You may widen this stance for a deeper stretch.
  • Breathe deeply for 5-10 counts.
  • Lower your back knee down if it becomes too challenging.
  • Stay on your hands if lowering to your elbows is too challenging.

10.) Camel Pose

  • Be on your knees, about hip width apart.
  • Place your hands on your hips behind you.
  • Pull your belly in, lift your chest, and gently lift your chin.
  • Slowly arch your back. Don’t expect to do this immediately; take it slow if you are just beginning to try Camel Pose. Be gentle with yourself.
  • Place a hand on a heel. Stay here and breathe deeply for 3-5 counts.
  • Place your other hand on your other heel and breathe deeply 3-5 times.
  • For a bigger challenge, gently place both hands on your heels and breathe deeply for 5 counts.
  • Be sure to slowly come out of this pose.

11.) Butterfly Pose into Seated Forward Fold

  • With both sitting bones on your mat, bring the bottom of your feet close together.
  • The farther forward your feet are in front of you, the easier this position becomes.
  • Inhale, lengthening your back, lifting your chin, and pressing your chest forward.
  • Exhale, releasing your feet while extending your legs and folding forward.
  • Repeat for up to 10 counts.

12.) Seated Twist

  • Sit with your legs extended in front of you.
  • Bend your left knee and pull it close to your torso.
  • Breathe deeply for 5 counts.
  • Pick up your left foot and place it over your right thigh.
  • Sit up tall, hugging your left leg with your right arm.
  • Twist to your left side and raise your right arm while breathing deeply for up to 10 counts.
  • Repeat with your right leg over your left thigh.
  • Wave to Cuba if you’re feeling it!

You did wonderful! Take a few moments to lie back on your mat and savor these moments of pure relaxation. Linger in the deep satisfying joy of letting go!

Halleluyah!

WARRIOR II POSE MINI CHALLENGE (unleash your inner warrior while building outer strength)

Hold your head high and confidently, unleashing your inner warrior as you stand in Warrior II Pose!

1.) Spread your feet approximately three to four feet apart, keeping them on the same line.

2.) Press down in all four corners of your feet, pushing into the outer edge of your back foot for stability.

3.) Keep pressing your extended arms back for a deeper stretch while extending your arms out to the sides.

4.) Gaze over your your middle finger with both palms facing down.

5.) Stand strong and breathe deeply for 10 deep breaths as you celebrate the power of the warrior!

6.) Step your back leg in for more support.

Step into Warrior II Pose. Build inner and outer strength while developing balance and stability. Cultivate grace and ease while building stamina and concentration. Stretch and strengthen your hips, legs, arms, chest, back, and feet while energizing your tired limbs. Stimulate your abdominal organs too all while improving your circulation and respiration.

Remember that God says you are MORE than a conqueror. ( Romans 8:37) Go forth and be all that He created you to be…strong, mighty, and victorious! For the Lord is with you like a “Mighty Warrior.” (Jeremiah 20:11.)

keep calm and conqueror on!

thanks for joining me and may love guide you where you may go…


YOGA CHALLENGE FOR GOING FORWARD

The theme of this yoga challenge is, moving forward!

Give yourself permission to let go of whatever does not serve you. Dedicate this precious time to free yourself from whatever is weighing you down and holding you back. Remember that God made you. He knows all about you, even the secret things you try to hide from everyone else. Every tear you have cried is placed in a bottle by Him. He thinks about you more than every grain of sand in all the world. He loves you more than anything or anybody in the entire world. In His greatest act of love for you, He left His throne in Heaven, became a human being, and sacrificed His life for your sins, so you could be forgiven and live with Him throughout all eternity. We cannot even imagine how much God loves and cares for us. But He does not ask us to. He simply says to come to Him, so he can help us. He came because He loves you!

Allow true love to envelope you in each of these yoga poses. This mini-yoga class was created with forward moving yoga poses to remind you of that love. It is a symbol of our willingness to let go of the past and move forward into the wonderful futures that God has in store for each one of us!

Get stronger physically and keep moving forward in your life with reflection upon His amazing words to you…

The righteous keep moving forward…

Job 17:9

You are a new creation…

2 Corinthians 5:17

Let go of what’s behind you so you can grab hold of what’s before you…

Philippians 3:14

When you are ready grab a mat, towel and water if you like and let’s get started!


1.) Forward Bend Variation

  • Take a huge breath with your hands at your hips or fingers interlocked behind your back. Let your chest lift and expand, awakening each cell with fresh oxygen. Add intensity by lifting your arms up behind you.
  • When you feel the need to exhale, simply release your breath while bending forward, leading with your chin. Let your arms stretch as far over as you can.
  • Repeat the stretch up, with a big inhale, and a forward bending stretch, forward and down, 5-10 more times.

2.) Forward Bend Twist

  • You should be loose from your Forward Bend, so on your last one stay bent over.
  • Release your left hand to the floor while twisting up with your right arm.
  • Bend your right leg.
  • Repeat bending your left leg with your left arm lifted.

3.) Warrior I Variation

  • Step forward with your right leg into Warrior I Pose.
  • Your Hips should be facing forward, over your front leg.
  • Try to pull up and out of your waist by pulling your belly in .
  • Breathe deeply, sweeping your arms up to Heaven. Or, press your palms together while gazing up toward Heaven.
  • Repeat the breathing in this position up to 10 times.
  • Step in a little closer for better balance and step your right leg out farther for more intensity.
  • Lift your heel if you can and really build your leg muscles!

4.) Lunge Twist

  • Lower your torso over your forward leg.
  • Place a hand on your mat on each side of your leg.
  • Hold for a few deep breaths.
  • When ready, place your left elbow over your right leg (knee, but preferably your thigh).
  • Press your palms together.
  • A deep inhale will allow you to stretch deeper over your leg.
  • Breathe deeply for 5 counts.

5.) Lunge Twist Variation

  • Lower your left arm to the mat.
  • Stretch your right arm up and gaze upward.
  • Breath deeply for 5 counts.
  • Switch hands.
  • Breathe deeply for 5 more counts.
  • Lower you back knee for more support.
  • Repeat positions 3-5 with your right leg forward.

6.) Fierce Pose

  • With legs together, sit back as if you were going to sit on a chair.
  • Stretch your arms up. Hold this position while breathing deeply up to 10 times.
  • Don’t let your knees extend beyond your toes.
  • To make it easier, don’t sit back too far and place your hands on your hips.

7.) Warrior III

  • Step out with your right leg.
  • You may bend that knee, but a straight leg is optimal.
  • Lift your back leg while keeping your hips facing forward.
  • Raise your arms, look forward, and breathe deeply for up to 10 counts.

8.) Low Lunge With A Prayer

  • Gently lower your back leg, with your knee touching your mat.
  • Sink forward, allowing for a deeper stretch.
  • Place your hands on your mat, hips, thigh, or in prayer position.
  • Breathe deeply for up to 10 counts.
  • Bring your back knee in for more support.
  • Say a prayer!
  • Repeat poses 7+8 with your left leg forward.

May love protect you and bless you as you move forward!

Halleluyah!

CROW POSE MINI CHALLENGE

In stormy weather, all birds find shelter, but the eagle is the one bird that avoids it all by flying above the clouds. In fact, it is the storms on the earth that give the eagle the fuel to soar. Unfortunately, we human beings often get our talons stuck in day-to-day worries. God is ready and able to lift us high above. We only need to trade in our worries and trust these amazing words for lift off…

Those who trust in the Lord will find new strength. They will soar high on wings like eagles.

Isaiah 40:31

The first five Yoga Poses below are strength building exercises. Complete these exercises on a regular basis and build up to Crow. When you feel that you are ready for Crow Pose, spread your wings and lean forward into the wind. Of course if you are already in full Crow, “happy flying!”

Relax for a few moments and breathe deeply to get in the flying zone.When you feel you are ready, grab a mat, water, towel and let’s fly!


1.) Hero Pose With Shoulder Stretch

  • Sit on your heels, or cross-legged.
  • Lift your left arm straight up. Bend your elbow and lower your hand to your upper back area.
  • Lift your right hand up to meet your left hand. Clasp them together.
  • Lift your chin, gaze up to heaven.
  • Hold the stretch for 5 -10 deep inhales and exhales.
  • Repeat with your right arm on top.
  • You may repeat this stretch a few more times with each side on top.
  • If your hands do not meet yet, work towards it!

2.) Plank Pose

  • From a seated position, walk your hands out to Plank Pose.
  • Your shoulders should be directly above your wrists.
  • Pull your belly in, with your legs at hip width.
  • Breathe deeply for 10 counts.
  • If you cannot do the full pose, lower to your knees and breathe deeply to build strength.
  • Repeat breathing deeply for 10 counts, and do this 3-5 more times in either position.

3.) Down Dog

  • From Plank Pose, lower your head and lift your sitting bones up.
  • Tuck your head under; look at your knees.
  • Feel a good stretch in the backs of your legs. Keep your heels down.
  • Breathe deeply for 5-10 counts.
  • Place your knees on the mat directly below your hips. Your wrists should be directly below your shoulders.
  • Lower back down to Plank Pose when you complete the exercise.
  • If possible, lower to Plank Pose and lift up to Down Dog for 5-10 deep breaths.

4.) Running Plank Pose

  • Start in Plank Pose.
  • Lift your right foot, bringing your knee to your chest with a big inhale.
  • Exhale, kick your foot back, then place it on your mat.
  • Repeat with each leg for 5-10 counts. Inhale, bringing each knee in and exhaling as you kick back.
  • Speed this up for a bit of fun!

5.) Elbow Plank Pose

  • You may begin on all fours or with your knees lowered. Optimally you should start from Plank Pose.
  • From Plank Pose, lower to your elbows, then back up to Plank Pose.
  • Repeat the process, inhaling in Plank Pose and exhaling in Elbow Plank Pose.

6.) Crow Pose

  • Place your hand stretched out on your mat, with your hands directly below your shoulders.
  • Lean forward. It will give you an indication of how strong you are, and whether you can hold the pose.
  • If you’re feeling confident, place a knee on your elbow.
  • If you’re still confident, place the other knee on your other elbow.
  • Now you’re flying in Crow Position so breathe deeply!
  • If you fall, try again!

Halleluyah!

YOGA CHALLENGE FOR HEALTHY THOUGHTS AND HAPPY HIPS

Science has established that negative thinking produces more negative thinking. Sadly, it soon bleeds into what we do, how we live, and who we are. Stress, even imagined stress, triggers the release of the hormone cortisol, which can damage our brains and weaken our cardiovascular/immune systems over time. What can we do to help ourselves? Make yoga a part of our daily life. Yoga reduces anxiety by calming the sympathetic nervous system. People who practice yoga on a regular basis have more brain cells in the part of their brain that regulates stress. Elongating your exhalations sparks your parasympathetic nervous system, which will slow down your heart rate. Meditation helps with letting negative thoughts go.

We can also focus on the Heavenly prescription of what to think about to stay healthy. Perhaps God knew the cares and worries of this world would pull us down and eventually suck the life out of us. That is why He tells us to think upon Heavenly things:

What ever things are true, honorable, right, pure, lovely, admirable, excellent, and worthy of praise, think on these things.

Phillippians 4:8

We also hold a lot of stress in our hips. We tighten and clench our hips subconsciously. As we get into a daily yoga practice, we start to feel that release. Many yoga classes include hip opening poses for this precise reason. That is why I have created an entire yoga class dedicated to the most effective hip openers out there. Breathing deeply and elongating your exhales will enhance every exercise below. Focusing on Heavenly thoughts while you move through these poses will enhance not just your yoga practice, but everything about yourself and they way you live in this world.

Do the entire challenge below with your right leg forward. Then do the entire challenge with your left leg forward. Put on some uplifting music and get into the stress free zone!

Always keep calm and yoga on!

1.) Eagle Warrior

  • Step forward with your right foot, bending your knee.
  • Be careful to keep both your heels on a straight line.
  • Be careful not to let your knee pass beyond your foot.
  • Be careful to keep both hips forward.
  • Try to pull up out of your waist area.
  • Slide your left arm under your right elbow. Stay here in this position.
  • If you can, twirl your left arm around your right arm. Clasp your hands if you can.
  • Tilt your head back; lead the tilt by lifting your chest.
  • Breathe deeply, holding here for 5-10 deep breaths.
  • Step in your back leg for better balance if you find the position too challenging.

2.) Low Lunge

  • You may lower your back knee to the mat or keep it straight.
  • Lower a hand to each side of your forward leg.
  • Breathe deeply for 5-10 counts.

3.) Wrap and Burn

  • From Low Lunge with your knee up or with back knee on your mat, simply slide your right arm under your leg and on top of your forward foot.
  • Place your left hand also on top of your foot. Clasp both hands together if you can.
  • Hold here for 5-10 deep breaths.
  • You may bend your back left knee at any time if this position becomes too challenging.

4.) Lizard Pose

  • Slowly lower to your elbows from Wrap and Burn position.
  • Your elbows should be directly below your shoulders.
  • Your foot should be directly below your knee.
  • Place your back knee on the mat if you find it too challenging.
  • Widen the distance between your legs for a deeper stretch.
  • Release and try sliding your forward leg over to the edge of your mat for a more challenging stretch.
  • Hold the position that fits you and breathe deeply for 5-10 counts.

5.) Pigeon Pose

  • Keep both hips forward.
  • Bend your forward leg across your mat as best you can.
  • Keep your back leg straight with your knee on your mat. Place your hands on your mat for support.
  • Stretch your head back by gently lifting your chest.
  • Breathe deeply for 5-10 deep breaths.
  • To increase the challenge, stretch your torso over your forward leg by leading with your chin. Walk your hands forward. Still keep both your hips facing forward.
  • Gently lower your head. Breathe deeply for 5-10 counts.

6.) Pigeon Pose Hamstring Stretch

  • In the same Pigeon Pose, grasp your back foot with both hands.
  • Keep both your hips forward.
  • Keep your forward leg extended across your mat.
  • Lift your chest arch and your head back.
  • Breathe deeply for 5-10 deep breaths.

7.) Half Split/Low Lunge

  • Release both arms from Pigeon Pose.
  • Extend your forward leg and lean over it.
  • Breathe deeply for 3 deep breaths.
  • Gently move forward into Low Lunge by bending your forward foot.
  • You may keep your hands on each side of your forward foot, or place them on your thigh or hips.
  • Breathe deeply for 5-10 deep breaths.
  • If you wish to stretch deeper, clasp your hands behind your back and lift them.
  • Sink deeper into the stretch and breathe deeply for 5-10 counts.
  • Continue the back and forth stretch from Half Split to Low Lunge for a total of 5 times.
  • Inhale in Half Split, Exhale into Low Lunge.

8.) Full Split

  • Place your hands on each side of your foot for support.
  • Slowly extend your forward leg.
  • Be careful to keep both hips forward facing.
  • Stretch into a Full Split.
  • It takes a lot of time to do this; be patient, practice a few times a week, and you will see yourself going deeper into Full Split over time!

9.) Seated Forward Bend

  • Sit with both legs stretched forward.
  • Inhale deeply, lifting up and out of your waist area as best as you can.
  • Stretch up with your arms and clasp your fingers together, inhaling deeply.
  • Exhale deeply, extending up and over your legs.
  • Repeat 10 times with deep breaths.

10.) Wide Legged Angle 

  • Extend both legs out to your sides.
  • Keep your sitting bones on your mat.
  • Stretch up and over your left leg.
  • Breathe deeply for 10 counts and then stretch over your right leg for 10 deep breaths.
  • Stretch forward and breathe deeply for 10 counts.
  • Lean on your elbows or lower your head to the mat for a deeper stretch.
  • Where ever you find yourself is the perfect place to begin this exercise. In time you will be able to stretch farther!


yoga on!

YOGA CHALLENGE FOR BUILDING STRENGTH (inner and outer strength)

Hit the mat with me and let’s get stronger together!

The yoga class below is chock full of yoga positions to help us feel strong and movements to help us build a strong body. Focusing on the verses of Scripture as we move in and out of these positions, will help us to be strong like God says that we are!

My biggest challenge here is wrapping my head around God’s strength. He is the creator of you and me. If that is not enough, He breathed all the stars into existence and walked on water too. He parted the giant sea and let people walk across it. He also raises people from the dead, including Himself once. He is way beyond strong. Best part? He says He will give us “His” strength! Imagine? He says, Be strong in the Lord and in His mighty power, (Ephesians 3:16).  (Psalm 46:1), tells us to let God be our refuge and strength because He is a very present help in need. And, He tells us that when we feel weakest is when He makes us strongest, (Joel 3:10). What blows my mind is, all that is required for possessing God’s amazing strength is….ask! Then trust Him, believing He will do it!

I hope you enjoy this full body yoga class. I realize that not everyone can do every position listed here. Don’t worry though. I always provide a detailed instruction of each position and a less challenging version too!

I hope you have fun and get stronger and I thank you for sweating with me! Now, let’s get started!

Please take a few moments to prepare your mind and body by sitting comfortably and breathing deeply.

1.) Star Pose Bend and Stretch

  • Stand with your feet out to your sides, toes pointing forward. (the wider your legs, the more difficult the pose)
  • Inhale, stretch upwards, extending your arms overhead. (interlock fingers with pointer fingers extended)
  • Exhale, slowly bending forward. (lead with your chin as you bend, stretching out and then down)
  • About halfway down, twist slightly to your right knee. (opposite arm, then gently pulls head to knee)
  • Repeat on each leg, pulling your head to each knee for 10 times on each leg.
  • Always begin with the Star Pose Stretch up before bending to each side.
  • You may only reach your hip, thigh, knee, or ankle at first. Simply do the exercise from there. You will still be building strength from where ever you may begin!


2.) Extended Leg Squat

  • Bend your knees while placing your hands in front of you. (gently lowering your torso)
  • Extended your left leg to the side and stretch.
  • Lift your sitting bones while keeping knees bent.
  • Extend your right leg to your side and stretch.
  • Repeat 2 more times.
  • When you are on your left leg with your right leg extended again, position your right toes to the side while lifting your back left leg.

3.) Warrior III

  • Rise into Warrior III.
  • If you can, press your palms into prayer pose.
  • Breathe deeply for 20 counts.
  • If you need support keep your palms on the mat, or use a sturdy chair, desk, table or wall for support.
  • Repeat the process of Extended Leg Squat into Warrior III balancing with your left leg on your mat!


4.) Warrior Dips

  • Stand with your legs together.
  • Step out with right leg into Warrior I position.
  • Your hips should be squared, facing forward.
  • Press your palms together with your pointer fingers extended.
  • Inhale, raising your arms over head and straighten both your legs. (back heel should be up)
  • Exhale, bending both your knees. (the deeper the bend, the greater the challenge)
  • Lift with inhales and straight legs.
  • Lower with exhales into dips by bending your knees.
  • Repeat with your right foot forward 10 -30 times.
  • Walk your back leg in for better balance; keep your hands on your hips, and dip as low as is comfortable for you for a less intense challenge!

5.) Star Stretch to Warrior II

  • Inhale in a Star Stretch position, arms overhead.
  • Exhale, pivoting your right foot to your right side. (your toes are pointing forward or to the right side)
  • Bend your right leg into Warrior II.
  • Try to keep your hips looking at the front of the room or forward facing.
  • Open your arms wide. (extending out from your shoulders)
  • Lift your forward foot for an added foot, ankle, and calf stretch.
  • Inhale again into Star Stretch, then exhale again into Warrior II.
  • Repeat 5-10 times.
  • Walk your legs in for less of a challenge!

6.) Peaceful Warrior 

  • Same starting position as Warrior II.
  • Lift your forward right arm and follow it back with your head.
  • Let your back left arm lower behind your torso or leg.
  • Breathe deeply for 5-10 counts!

 7.) Extended Side Angle

  • Bring your back left arm up and over your forward knee.
  • Your forward right arm may rest on your thigh or knee, even your hip.
  • Breathe deeply for 5-10 counts.
  • Move slowly from Extended Side Angle to Peaceful Warrior 5 times! (only the arm position changes)

8.) Warrior II 

  • Lift your hands over your head, and press your palms together.
  • Lift your forward right heel.
  • Breathe deeply for 5-10 counts.
  • Walk your legs in closer for less of a challenge!

9.) Star Stretch to Wide Legged Horse Stance Position

  • Stretch into Star Pose Stretch with a big inhale. (both toes are pointing forward)
  • Exhale and release your arms pressing your palms together while bending your knees out to the sides. Toes should be pointed out slightly. (knees should not extend over toes)
  • Repeat the stretch up with big inhale, then exhale, releasing your arms and bending your knees to the sides.
  • Repeat the process 10 times.
  • For a less intense version, slightly bend your knees and do not extend them so far to the sides!

10.) Repeat numbers 2-10 with your left leg forward!

 11.) Seated Shoulder and Chest Opener

  • Sit on your heels.
  • Stretch your left arm up, bending it behind your head.
  • Stretch your right arm up behind you.
  • Let your fingers meet, or move them as close together as you can.
  • Stretch and breath deeply for 10 counts.
  • Repeat with opposite arms!


12.) Child’s Position

  • Lean forward.
  • Rest your forehead on the mat.
  • Extend your arms above you on the mat.
  • Rest here for 10 deep breathes!

13.) Downward Dog

  • From a Child’s Position, lift your sitting bones.
  • Your arms are directly below shoulders.
  • Your feet are directly below hips.
  • Your legs are as wide as your hips.
  • Stretch and lengthen your legs into Downward Dog.
  • Breathe deeply for 5 counts.
  • Remain in a Child’s Position for a less intense challenge. Or come on your hands and knees – try curling your toes under and lifting your sitting bones up. Repeat a few times!

14.) Plank Position

  • All hand, feet, and hip positions remain the same as Downward Dog.
  • Simply lower your sitting bones from Down Dog into Plank Position.
  • Deeply breathe for 10-30 seconds.
  • You may be on your knees or lower to your knees during the exercise and still build strength in your core!

15.) Knee to Chest Planks

  • From Plank Position ( or on your knees in a Plank position) please inhale deeply.
  • Bring your right knee to your chest and exhale.
  • Repeat bringing each knee to your chest for 10 counts each leg.
  • Come to Child’s Pose.
  •  Repeat 10 more counts on each leg. (Total is 60 times or 30 times each leg)
  • Lower your knees to your mat and do this exercise from there for a less intense version!

16.) Cobra Pose

  • Lie down forward facing on your mat.
  • With hands directly below shoulders, press your palms into the mat, raising up into Cobra Position.
  • Your toes are flat on top of the mat.
  • Your head stretches back. (great for a neck and chin stretch)
  • Breathe deeply up to 10 counts.
  • Lower to your elbows for a less intense version!


17.) Elbow Plank into Plank Pose

  • Lie flat, placing your elbows directly below your shoulders.
  • Curl your toes.
  • Lift your sitting bones.
  • Balance here for 10 seconds.
  • Then, place each palm directly below each shoulder.
  • Lift your torso up into Plank Pose.
  • Then, lower your torso to Elbow Plank Pose.
  • Repeat 5-25 times.
  • You can always do more counts or less counts and build up strength, or do the entire process with your knees on the mat!

18.) Crow Position

  • With palms below shoulders, walk your legs in.
  • Bend your elbows and lift one knee up.
  • Place your knee on your elbow.
  • If you feel strong and balanced, lift your other knee up onto your other elbow.
  • Hold and breathe deeply for 5-20 counts.
  • Continue lifting one knee then the other until you get stronger. Come to your hands and knees and bring each knee to your chest for 10-20 counts or rest in Child’s Pose for a less intense version of the position!


19.) Bowing Position

  • Sit on your heels, interlocking your fingers behind you.
  • Inhale, lift to your knees, lean back, and lift your palms.
  • Exhale, slowly round your shoulders, and lower your head to the mat.
  • Keep your palms pressing upward.
  • Repeat for 10-20 counts, inhaling up and exhaling down.
  • Use a pillow or chair seat to rest your head as you come down. Place your hands on your hips or lower back if interlocking your fingers is too challenging at first!

20.) Hero Position

  • Sitting on your heels, extend your knees to the sides.
  • From there, with a deep inhale walk your hands forward as far as you can.
  • If you can, lower your head to the mat.
  • Breathe deeply for 30 seconds to 1 minute.
  • Rest your head on a chair seat or pillow or lower to your elbows for a less intense version!


21.) Savasana

  • Just say ahhhh! You made it!
  • Relax here to reap the benefits of your physical practice.
  • Breathe deeply.
  • Try to imagine your wonderful new life of Godly strength!

Be strong, Be brave, Be fearless! You are never alone! Joshua 1:9

RELAXING AND UNWINDING YOGA CHALLENGE (stress relief you can do in your jammies)

Put on some relaxing music, light a candle, maybe get into your pajamas. Do whatever gives you a relaxing vibe before moving into this soothing yoga flow. Resting in your Heavenly Father’s arms, you need not worry anymore, for He says that you may cast all your cares and worries on Him. (1 Peter 5:7) He’s calling out to each of us (Matthew 11:28) to come to Him, because only He has the deep abiding rest that our bodies and souls crave. The Psalmist sums it up beautifully: “My soul finds rest in God alone” (Psalm 62:1).

During these 16 yoga positions, designed to flow into each other, try to inhale all the good and restful thoughts of our Heavenly Father’s care. Remember, He knows how many hairs are on your head this very moment (Matthew 10:30). He also loves each of us mightier than every wave in the sea (Psalm 93:4). And, His thoughts toward each of us outnumber the grains of sand in the entire world (Psalm 139:18)!

Breathe, relax, in the flow, let it go…

1.) Cross Legged Twist

  • Sit cross legged.
  • Keep both sitting bones on your mat and your chin up, shoulders down, and back straight.
  • Inhale deeply.
  • Exhale as you twist to the side.
  • Place a hand on your opposite knee, the other hand in back of you, for a more intense twist.


2.) Cross Legged Stretch Variation 

  • Clasp fingers behind your head.
  • Inhale deeply while stretching backwards as far as is comfortable for you. Let your chest lead the stretch. Keep your chin and eyes up. Let your head rest in your palms.
  • Exhale, rounding your back as you lower your head forward.
  • Press your chin into your body and  use a little pressure with your hands as you pull your head down.
  • Feel a great neck stretch and repeat the process at least 10 times.

2a.) Side Stretch

  • Simply inhale deeply in the middle and exhale as you stretch to the side.
  • Repeat the process on each side 10-20 times.
  • Inhale deeply in the middle and exhale, folding over your knee.
  • Repeat this process to each knee, 10-20 times each knee.
  • Remember to inhale in the middle with sitting bones down, chest lifted, chin up, and exhale as you move to each side.

3.) Cat/Cow Pose

  • Start with hands below shoulders and knees below hips.
  • Inhale deeply. Gently drop your head and rounding your back.
  • Exhale deeply. Arch your back with chin up.
  • Repeat the process 10-20 times. Remember to breathe!


4.) Child Pose/ Shoulder Stretch

  • Sit back onto your heels.
  • Stretch your arms out in front of you.
  • Breathe deeply for 10 counts.
  • Slip your left arm under your other arm.
  • Breathe deeply for 5-10 counts.
  • Repeat this process with your right arm.

5.) Baby Down Dog

  • From a Child Pose position, lift your sitting bones.
  • Slide your hands and arms forward.
  • Arch your back or stretch farther forward.
  • Breathe deeply for 5-10 counts.

At this point your right foot will remain forward through out exercises, 6,7,8, and 9.

6.) Low Lunge Stretch

  • From Child’s Pose, come to your hands and knees.
  • Slip your right foot between your arms.
  • Stretch your back leg out behind you as far as you can.
  • Breathe deeply for 5 counts.
  • Straighten your forward leg and fold over it.
  • Breathe for 5 counts.
  • Repeat this motion for 5 breaths in each position for a total of 10 times.

7.) Low Lunge Twist on Both Sides

  • As you go into Low Lunge Stretch, lift your back knee off your mat.
  • Place your left hand on your mat, beside your forward foot and directly below your shoulder.
  • Stretch your right arm up and twist.
  • Look up and breathe deeply for 5 counts.
  • Switch hands. Your right hand should be on your mat now, with your left hand lifted up.
  • Breathe deeply again for 5 counts.

8.) Low Lunge with Shoulder Stretch

  • Gently lower your back left knee to your mat.
  • Your right knee should be directly on top of your right foot.
  • Stay here and breathe deeply for 10 counts.
  • If you can, place your hands on your hips.
  • Clasp your fingers behind you and look up for an extra heart, lung, shoulder, neck, and arm stretch
  • Hold the stretch for a good 5-10 deep breaths.
  • Lift your wrists and arms behind you. Stretch your back leg out farther for an even deeper whole body stretch.

9.) Low Lunge Hamstring Twist

  • Release your Low Lunge Shoulder Stretch by placing your hands on each side of your right foot.
  • Place your left hand next to your right foot.
  • Bend your back leg.
  • Hold your foot and bend it toward your body as far as you can.
  • Breathe deeply for 5 counts

It is time now time to repeat positions 6,7,8, and 9 with your left leg forward and your right leg behind.

10.) Upward Dog

  • Start by lying down.
  • Place your hands directly below your shoulders
  • Press through your arms and lift your chest and head backwards (see the picture!).
  • Breathe deeply for 3 counts.

11.) Downward Dog

  • From Upward Dog Position, curl your toes, lower your head, round your back, and lift your sitting bones.
  • Your hands should be shoulder-width. Your legs should be hip width apart.
  • Keep your heels down, and keep pressing your sitting bones up.
  • Stay here until you feel a good stretch in the backs of your legs and shoulders.
  • Breathe deeply 3-5 counts.

Move into Upward Dog position and then Downward Dog position, for 3 more counts in each position.

12.) Child’s Pose

  • Sit back on your heels.
  • Lower your head to your mat, or place a pillow below your head if necessary.
  • Keep your arms back, beside your torso.
  • Let your shoulders release.
  • Widen the distance between your legs, or rest your head on your arms.
  • Breathe deeply for 5-10 counts.

13.) Rock and Roll

  • Sit with your legs forward.
  • Rock backward, then rock forward.
  • Do this for 10 counts.

14.) Butterfly Pose and Stretch

  • Sit and press the bottoms of your feet together.
  • Hold your feet,inhaling while arching your back with your chest and chin up.
  • Exhale and fold forward.
  • Repeat for 5-10 deep breaths.


15.) Reclining Butterfly

  • Lie on your back with your knees up and your arms at your sides
  • Inhale and lift your arms up over your head. Let your knees gently drop to the sides.
  • Don’t force your legs apart! Let them gently release to the sides.
  • Exhale. Close your legs and rest your arms to the sides.
  • Repeat this process 5 times.
  • Stay in the open legs position for 5-10 deep breaths.

16.) Legs Up a Wall

  • Rest your legs on a wall or a chair. Bend your legs and res them on the seat.
  • Make your sitting bones touch the wall, or get as close to the chair as possible.
  • Stay here and breathe deeply for 1-3 minutes.
  • Lie on your back, breathing deeply for as long as you like.

PEACE AND FLEXIBILITY YOGA STRETCHING CHALLENGE ( A calm peaceful yoga class of deep stretching for flexibility)

The benefits of stretching our wonderfully made bodies can be pretty incredible. Muscles loosen, blood flows, circulation improves, and our range of motion gets better. Joints, ligaments and tendons become well lubricated, while chronic pain and arthritis can actually improve over time. Stretching offers a sense of well being too. Stretching deeply and breathing deeply while you stretch helps your body release pent up stress and tension. Less stress is more peace. Peace is more calm.

Yoga is definitely a great de-stresser. But for true heart and soul peace… God tells us that it is possible to have a peace that surpasses human understanding! (Philippians 4:7) And, if we keep our minds on Him, He says He will give us “perfect peace.”(Isaiah 26:3) Even in a raging storm we can still have peace. (Psalm 107:29) Belief in what God is saying to us enables us to have what He is saying. May peace be with you, as you stretch and flex!

The ten yoga stretches below, target big muscle groups for a deep release. Simply start your stretch at the place that is right for you and take it from there. Complete this yoga workout on a regular basis and your flexibility will greatly improve. Remember that detailed instruction is always provided for every Halleluyah yoga workout, whether you are a beginner or seasoned yogi master!

1.) Cross Legged Stretch 

Sit cross legged. Then inhale deeply, stretch your arms up, and press your palms together in a prayer pose. Slowly release your arms with a deep exhale, lowering them to your mat. Repeat 10 times. If you like, on your inhales breathe in God’s peace. On your exhales, release your care worries fears and doubts to God. Don’t rush; just breathe.

2.) Side Stretch

With a big inhale, stretch your arms up once again. This time, with a deep exhale, stretch your arm to the side. Try to let your elbow drop to your mat. Stay stretching and breathing for 5-10 deep breaths.

Continue stretching to the side and extend your leg to the side. Bending your extended leg is perfectly fine. Do what is best for you! Continue stretching to the side for another 10 deep breaths.

Come back to a cross legged position. Then repeat the process on your other side.


3.) Butterfly Stretch

Press the bottom of each foot together. Pull your feet as close to your body as possible. Stretch and breathe for a few counts. If the stretch is too intense, simply move your feet forward until it feels good.

Now inhale deeply, arch your back, lift your chest, and stretch your neck and head.

Now exhale deeply, round your shoulders and back forward while stretching over your feet. Try stretching your head to your feet. Repeat the process at least 10 times with deep breathing.


4.) Wide Legged Stretch

Extend your legs to each side. Lower your torso. If possible, stretch your arms out to the sides. Breath deeply and linger in this position, which will allow you to stretch deeper. You can always keep your knees bent and and legs out to the front more than the sides if you cannot extend your legs out all the way

Try walking your hands out or lean on your elbows. 1-3 minutes in this position will seriously improve your flexibility and bring a sweet calmness to your body. You may even realize after a few minutes in this position that you can stretch a little deeper!

After you linger, stretch to each side. Try to get your face to your knee and your hands behind the bottom of each foot. Now linger here with deep breaths and then switch sides. Continue switching sides and breathe for 10-20 stretches each side.

When you are finished, release your legs and shake them out.


5.) Seated Forward Fold

Sit with your legs extended forward, with palms together and index fingers sticking straight up. Inhale deeply, stretching over your extended legs. Try to lead with your chin. Exhale, grasping your feet if you can. Bend your legs if you can’t hold them straight. Repeat the process at least 10 times. After this, fold forward one more time and stay there for a few deep breaths.

6.) Body Hug

Lie back, pulling your knees to your chest. Wrap your arms around your legs and give your entire body a big hug.

You can release your body hug and stretch out on the floor with a deep inhale. Then exhale and pull your body in again, giving it a big hug! Repeat a few more times. Lift your head if you can. Roll around in this ball if it feels good, massaging your spine and back.

If you cannot hug your knees in, bend them into your chest as far as you can.

7.) Bridge Lifts

Lie flat and bend your knees. Pull them toward your back if you can. Grasp your ankles. Inhale deeply while lifting your sitting bones as high as possible. Even one inch is a great starting place! Exhale deeply and slowly lower your sitting bones. Repeat this 10-15 times. Go slow.

When you are finished, try one more time to lift your sitting bones up. Stay here for 10 deep breaths if possible.

8.) Happy Baby Pose

Lie flat and raise your feet. Try to grasp each one or grab your ankle or calf. Then pull them down from your heels as far as possible. Breathe deeply for 10 counts. Now have some fun by rolling around while holding your feet. It will also massage your spine and back.


9.) Reclining Split Stretches

Hug your knee into your chest as best you can. Breathe deeply for a few counts.

Grasp your leg where you can and pull your knee down.

If you can, pull your foot down. Lift your head to meet your knee. Breathe deeply for a few counts.

Do the whole process with your other leg.

Remember that your current ability to stretch is perfect for you. Just keep practicing, and with consistent stretching you will see your flexibility increase!

10.) Reclining Spinal Twist

Lie back and bend your knees. With a big inhale, let your knees fall to the side. Keep your shoulders on your mat with arms extended to the sides. Breathe deeply here about 5-10 times. Come back to the middle with knees up. Repeat on your other side.

I hope you enjoyed this stretch!

Peace be with you always!