Hit the mat with me and let’s get stronger together!
The yoga class below is chock full of yoga positions to help us feel strong and movements to help us build a strong body. Focusing on the verses of Scripture as we move in and out of these positions, will help us to be strong like God says that we are!
My biggest challenge here is wrapping my head around God’s strength. He is the creator of you and me. If that is not enough, He breathed all the stars into existence and walked on water too. He parted the giant sea and let people walk across it. He also raises people from the dead, including Himself once. He is way beyond strong. Best part? He says He will give us “His” strength! Imagine? He says, Be strong in the Lord and in His mighty power, (Ephesians 3:16). (Psalm 46:1), tells us to let God be our refuge and strength because He is a very present help in need. And, He tells us that when we feel weakest is when He makes us strongest, (Joel 3:10). What blows my mind is, all that is required for possessing God’s amazing strength is….ask! Then trust Him, believing He will do it!
I hope you enjoy this full body yoga class. I realize that not everyone can do every position listed here. Don’t worry though. I always provide a detailed instruction of each position and a less challenging version too!
I hope you have fun and get stronger and I thank you for sweating with me! Now, let’s get started!
Please take a few moments to prepare your mind and body by sitting comfortably and breathing deeply.


1.) Star Pose Bend and Stretch
- Stand with your feet out to your sides, toes pointing forward. (the wider your legs, the more difficult the pose)
- Inhale, stretch upwards, extending your arms overhead. (interlock fingers with pointer fingers extended)
- Exhale, slowly bending forward. (lead with your chin as you bend, stretching out and then down)
- About halfway down, twist slightly to your right knee. (opposite arm, then gently pulls head to knee)
- Repeat on each leg, pulling your head to each knee for 10 times on each leg.
- Always begin with the Star Pose Stretch up before bending to each side.
- You may only reach your hip, thigh, knee, or ankle at first. Simply do the exercise from there. You will still be building strength from where ever you may begin!


2.) Extended Leg Squat
- Bend your knees while placing your hands in front of you. (gently lowering your torso)
- Extended your left leg to the side and stretch.
- Lift your sitting bones while keeping knees bent.
- Extend your right leg to your side and stretch.
- Repeat 2 more times.
- When you are on your left leg with your right leg extended again, position your right toes to the side while lifting your back left leg.

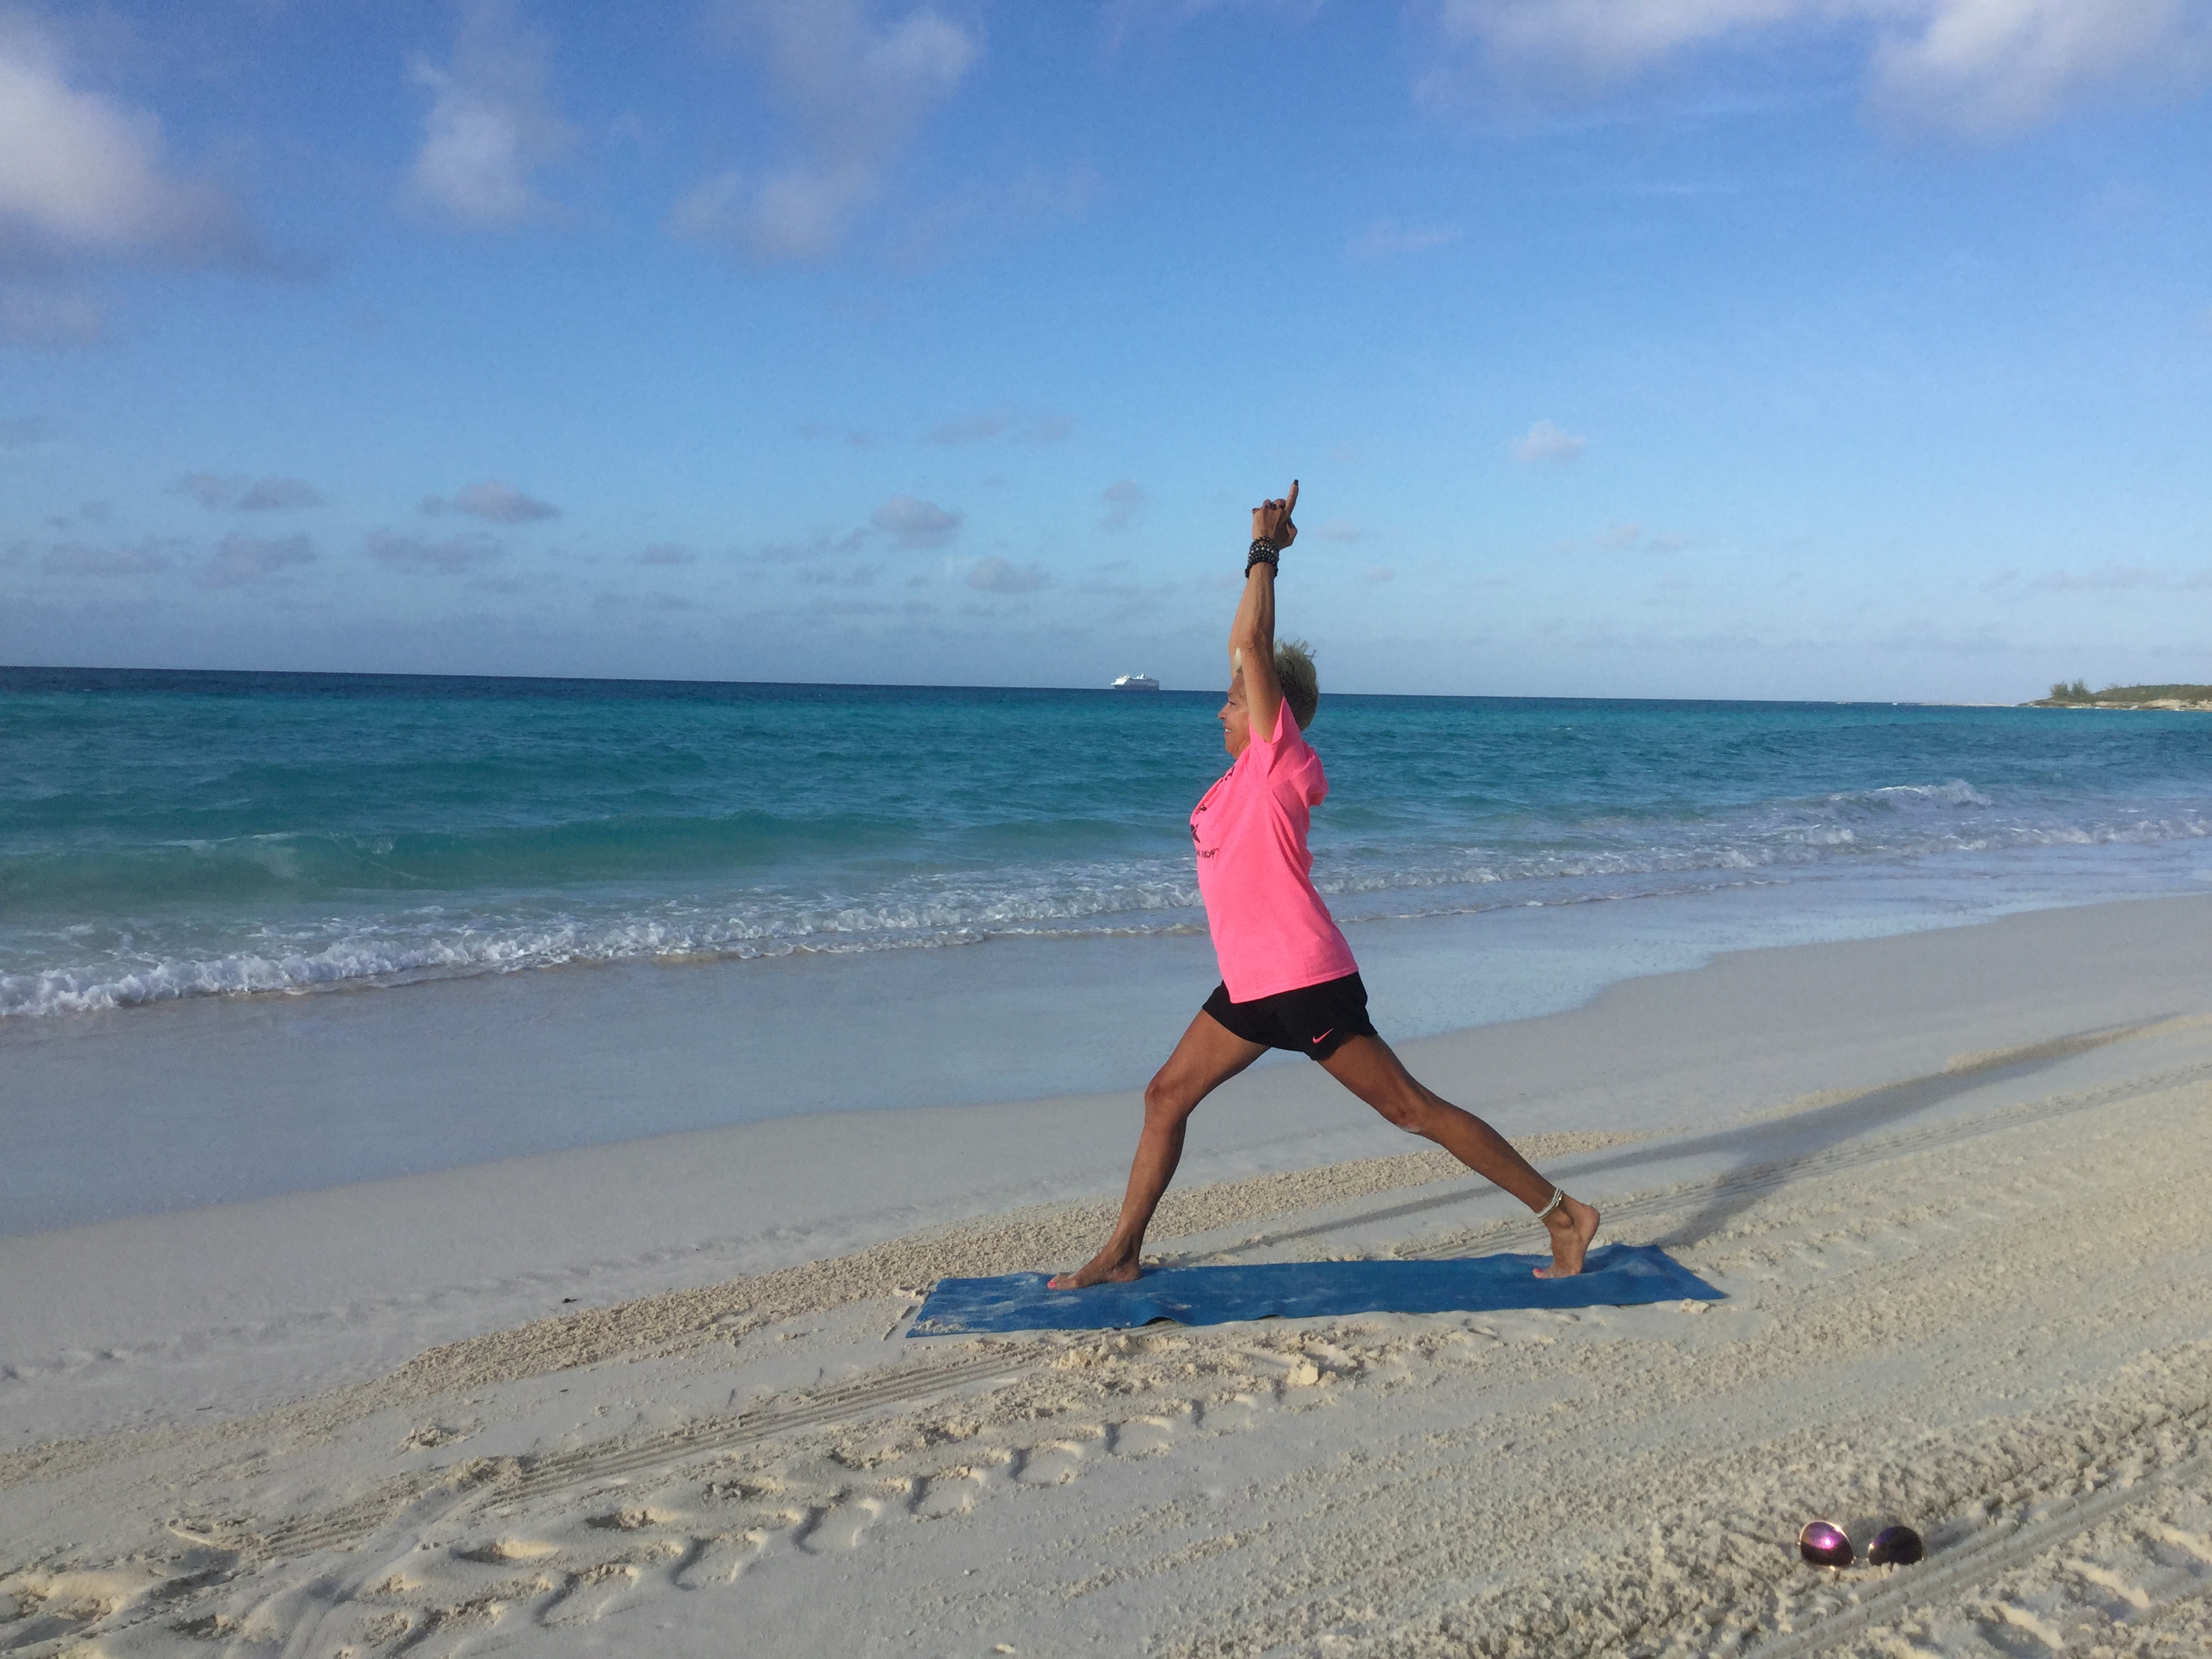
3.) Warrior III
- Rise into Warrior III.
- If you can, press your palms into prayer pose.
- Breathe deeply for 20 counts.
- If you need support keep your palms on the mat, or use a sturdy chair, desk, table or wall for support.
- Repeat the process of Extended Leg Squat into Warrior III balancing with your left leg on your mat!


4.) Warrior Dips
- Stand with your legs together.
- Step out with right leg into Warrior I position.
- Your hips should be squared, facing forward.
- Press your palms together with your pointer fingers extended.
- Inhale, raising your arms over head and straighten both your legs. (back heel should be up)
- Exhale, bending both your knees. (the deeper the bend, the greater the challenge)
- Lift with inhales and straight legs.
- Lower with exhales into dips by bending your knees.
- Repeat with your right foot forward 10 -30 times.
- Walk your back leg in for better balance; keep your hands on your hips, and dip as low as is comfortable for you for a less intense challenge!


5.) Star Stretch to Warrior II
- Inhale in a Star Stretch position, arms overhead.
- Exhale, pivoting your right foot to your right side. (your toes are pointing forward or to the right side)
- Bend your right leg into Warrior II.
- Try to keep your hips looking at the front of the room or forward facing.
- Open your arms wide. (extending out from your shoulders)
- Lift your forward foot for an added foot, ankle, and calf stretch.
- Inhale again into Star Stretch, then exhale again into Warrior II.
- Repeat 5-10 times.
- Walk your legs in for less of a challenge!

6.) Peaceful Warrior
- Same starting position as Warrior II.
- Lift your forward right arm and follow it back with your head.
- Let your back left arm lower behind your torso or leg.
- Breathe deeply for 5-10 counts!

7.) Extended Side Angle
- Bring your back left arm up and over your forward knee.
- Your forward right arm may rest on your thigh or knee, even your hip.
- Breathe deeply for 5-10 counts.
- Move slowly from Extended Side Angle to Peaceful Warrior 5 times! (only the arm position changes)

8.) Warrior II
- Lift your hands over your head, and press your palms together.
- Lift your forward right heel.
- Breathe deeply for 5-10 counts.
- Walk your legs in closer for less of a challenge!


9.) Star Stretch to Wide Legged Horse Stance Position
- Stretch into Star Pose Stretch with a big inhale. (both toes are pointing forward)
- Exhale and release your arms pressing your palms together while bending your knees out to the sides. Toes should be pointed out slightly. (knees should not extend over toes)
- Repeat the stretch up with big inhale, then exhale, releasing your arms and bending your knees to the sides.
- Repeat the process 10 times.
- For a less intense version, slightly bend your knees and do not extend them so far to the sides!
10.) Repeat numbers 2-10 with your left leg forward!

 11.) Seated Shoulder and Chest Opener
- Sit on your heels.
- Stretch your left arm up, bending it behind your head.
- Stretch your right arm up behind you.
- Let your fingers meet, or move them as close together as you can.
- Stretch and breath deeply for 10 counts.
- Repeat with opposite arms!

12.) Child’s Position
- Lean forward.
- Rest your forehead on the mat.
- Extend your arms above you on the mat.
- Rest here for 10 deep breathes!


13.) Downward Dog
- From a Child’s Position, lift your sitting bones.
- Your arms are directly below shoulders.
- Your feet are directly below hips.
- Your legs are as wide as your hips.
- Stretch and lengthen your legs into Downward Dog.
- Breathe deeply for 5 counts.
- Remain in a Child’s Position for a less intense challenge. Or come on your hands and knees – try curling your toes under and lifting your sitting bones up. Repeat a few times!

14.) Plank Position
- All hand, feet, and hip positions remain the same as Downward Dog.
- Simply lower your sitting bones from Down Dog into Plank Position.
- Deeply breathe for 10-30 seconds.
- You may be on your knees or lower to your knees during the exercise and still build strength in your core!

15.) Knee to Chest Planks
- From Plank Position ( or on your knees in a Plank position) please inhale deeply.
- Bring your right knee to your chest and exhale.
- Repeat bringing each knee to your chest for 10 counts each leg.
- Come to Child’s Pose.
- Repeat 10 more counts on each leg. (Total is 60 times or 30 times each leg)
- Lower your knees to your mat and do this exercise from there for a less intense version!

16.) Cobra Pose
- Lie down forward facing on your mat.
- With hands directly below shoulders, press your palms into the mat, raising up into Cobra Position.
- Your toes are flat on top of the mat.
- Your head stretches back. (great for a neck and chin stretch)
- Breathe deeply up to 10 counts.
- Lower to your elbows for a less intense version!

17.) Elbow Plank into Plank Pose
- Lie flat, placing your elbows directly below your shoulders.
- Curl your toes.
- Lift your sitting bones.
- Balance here for 10 seconds.
- Then, place each palm directly below each shoulder.
- Lift your torso up into Plank Pose.
- Then, lower your torso to Elbow Plank Pose.
- Repeat 5-25 times.
- You can always do more counts or less counts and build up strength, or do the entire process with your knees on the mat!


18.) Crow Position
- With palms below shoulders, walk your legs in.
- Bend your elbows and lift one knee up.
- Place your knee on your elbow.
- If you feel strong and balanced, lift your other knee up onto your other elbow.
- Hold and breathe deeply for 5-20 counts.
- Continue lifting one knee then the other until you get stronger. Come to your hands and knees and bring each knee to your chest for 10-20 counts or rest in Child’s Pose for a less intense version of the position!


19.) Bowing Position
- Sit on your heels, interlocking your fingers behind you.
- Inhale, lift to your knees, lean back, and lift your palms.
- Exhale, slowly round your shoulders, and lower your head to the mat.
- Keep your palms pressing upward.
- Repeat for 10-20 counts, inhaling up and exhaling down.
- Use a pillow or chair seat to rest your head as you come down. Place your hands on your hips or lower back if interlocking your fingers is too challenging at first!

20.) Hero Position
- Sitting on your heels, extend your knees to the sides.
- From there, with a deep inhale walk your hands forward as far as you can.
- If you can, lower your head to the mat.
- Breathe deeply for 30 seconds to 1 minute.
- Rest your head on a chair seat or pillow or lower to your elbows for a less intense version!
 21.) Savasana
- Just say ahhhh! You made it!
- Relax here to reap the benefits of your physical practice.
- Breathe deeply.
- Try to imagine your wonderful new life of Godly strength!
Be strong, Be brave, Be fearless! You are never alone! Joshua 1:9


